Introduction
[Practical 1 of 11]
In this introductory practical, we'll run the java compiler and interpreter on some pre-existing code, so you can get used to the process. We'll then write and run our first program.
Make sure you've got (and are familiar with) the following software before attempting the practical. If you're in one of our labs these should be installed already and you can ignore the "JDK" below - just make sure you're familiar with the others.
Windows Explorer; Command Prompt; JDK; Notepad++; Firefox/Chrome.
Note that all the practicals are broken into sections separated with horizontal lines - READ DOWN TO THE END OF EACH SECTION BEFORE STARTING IT.
First, we need a directory structure:
Before we get going, we need to make ourselves a directory structure for our files (if you are unsure how to do this, see the Windows Explorer tutorial).
Make a directory called 'java', somewhere relatively simple to get to on your hard-drive (we'll assume you do this directly on a drive called 'm', but you might do it on 'c').
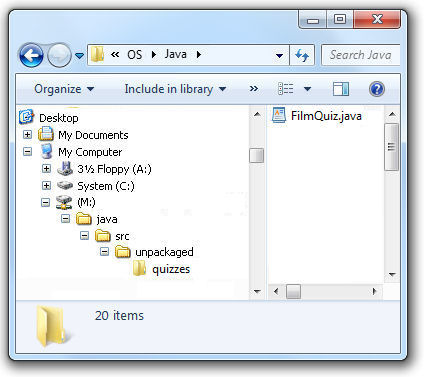
Inside this directory, make another called 'src' (for "source code"). In this make one more called 'unpackaged', and within this, one called 'quizzes' (note the letters should be lower case).
This may seem bizarre, but it has to do with an important Java naming convention we'll be using in the future.
You should end up with something like this ---->
Next download the Java file:
Download it into the 'quizzes' directory you've just made. The file can be downloaded from the following link: FilmQuiz.java. If you aren't sure how to download the file from this link, check out the Web browser tutorial.
You can now open the .java file in Notepad++, and have a look at it (see the Windows Explorer tutorial). Try to work out what it's likely to do - obviously 90% will look like gibberish, but some of it should make sense.
Now open up a 'command' prompt.
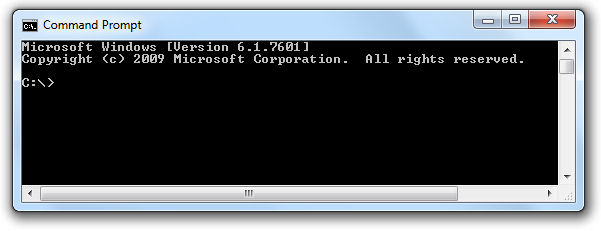
Again, see the Command Prompt tutorial if you don't know how to do this. When you open it, it will probably look something like the screenshot to the right.
The c:\> bit is where you type. It shows you where you are in the directory structure. For the command prompt shown in the diagram, the user is on the c: drive and not yet in any directories.
You need to move to the drive and directory where you saved the FilmQuiz.java file.
Once in the prompt window, type the letter of the drive your 'quizzes' directory is on, and then type a colon.
For example...
> m:
And hit return. Your prompt should now say something like
M:\>
This has moved you to the new drive.
Once at the drive, change to your 'quizzes' directory.
Type
cd \java\src\unpackaged\quizzes\
This will move you into the 'quizzes' directory.
Type
dir
You should see the FilmQuiz file.
Extra: note that you can use the notation mentioned above with the cd 'change directory' command to move around. Once in your quizzes directory, try:
cd ..\..\
cd \
cd \java\src\unpackaged\
cd .\quizzes\
We'll now compile the code into bytecode for a JVM:
To do this, type:
javac FilmQuiz.java
Java is case-sensitive, so make sure you type it exactly as it is. It it works, the system won't tell you anything, it will just quitely move to the next line. However, at the moment, this may not work. This is because the JDK hasn't been added to the computer PATHs (where the computer looks for stuff) -- we're working on it. Cut and paste the following into the command prompt using the right mouse button to paste:
set PATH=%PATH%;"C:\Program Files\Java\jdk1.8.0_60\bin"
This will set up the PATH so you should be able to type the javac command as above. You may find it useful to bookmark this page, or cut and paste this line into Notepad, as you'll need to paste it into the command line again if you close and reopen the command line. If this doesn't work ask us for help, or, if you are on your own computer, check the JDK tutorial.
If you now use 'dir' to view the directory contents, you should see a new file 'FilmQuiz.class' (there are actually two class files generated from this code; this is fairly unusual). This .class file contains the Java bytecode. This is what you will run and distribute to people.
Finally, we'll run the bytecode using the interpreter:
To do this type:
java FilmQuiz
Again this is case-sensitive. Note that there is no '.java' or '.class' file extension used here, even though it is essentially running the .class file. You should see a pop-up window appear (again, if this doesn't work, see the JDK tutorial).
Hint: You should be able to use the up and down keys on your keyboard to cycle through previous stuff you've typed, which you can then edit - saves you typing the command each time.
You should now see a little quiz window, with some quotes in it.
Obviously, as a developer, the process is much more involved than just clicking on an icon to run a file. We'll talk about how to set things up for a normal user at the end of the course. We'll also look later at "Integrated Development Environments" (IDEs): software to make this job easier for coders. For now, however, we'll do this process manually so we understand the basics and can understand what the command line tools are telling us.
Have a play around with the application and compare it with the code in the .java file, then go on to Section 2, where we'll tackle HelloWorld.