Spatial Interaction Modelling: Structuring into methods
[Practical 5 of 11 - Part 1]
Refactoring Data Load:
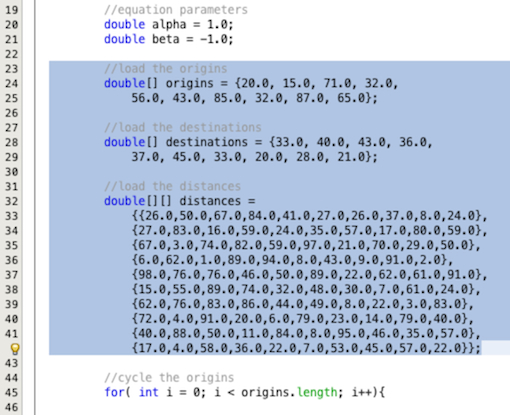
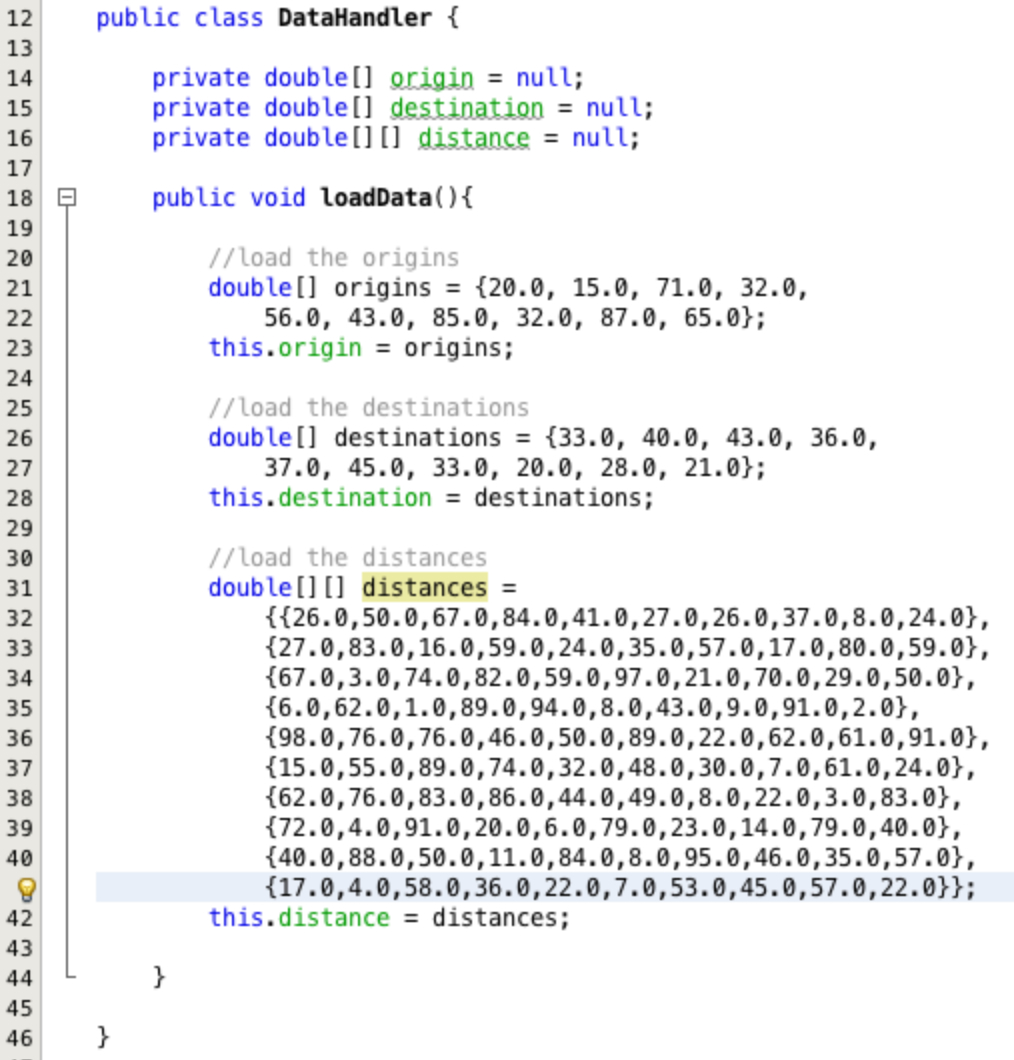
The first part to refactor is the way we load and access the data for the model. We want to separate out the complexities of data access from the model running. This way if we change how the data is loaded we don't end up changing the rest of the program. This is what is referred to as loose coupling . Figure 1 shows the code we are concerned with.
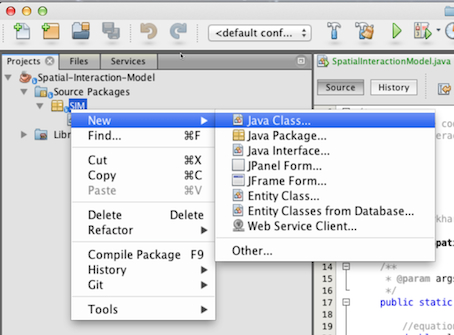
First we need a class to put the code in. Right click on the SIM package in the Projects area of the IDE as shown in Figure 2. Select New >> Java Class...
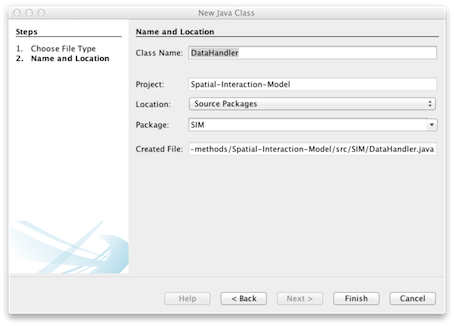
In the New Java Class wizard window that opens type in the class name DataHandler as shown in Figure 3 and click finish.
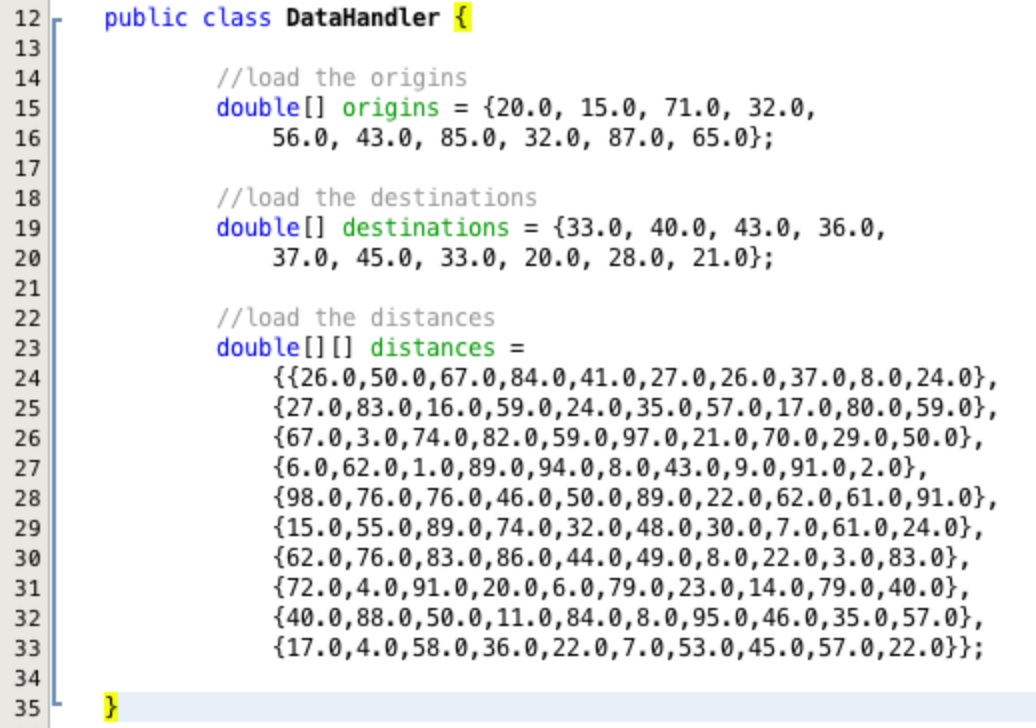
Copy the code highlighted in Figure 1 from our SpatialInteractionModel class and paste it into the new DataHandler class between the class opening and closing braces shown highlighted in Figure 4.
Don't worry about the red lines that appear in the SpatialInteractionModel class. This is Netbeans letting us know that it has found code that will not compile before we even try to... The really handy aspect of this feature is that it even shows you where the error is in the class just like a spell-checker. We will come back and solve these issues in a moment.
One of the reasons why we are refactoring our code is to make it more flexible in the future. One of the ways we can do this is by breaking the code down into small units that undertake a certain function. These are called methods. The first thing we are going to do is create a method that we will call to load our data.
Insert the line of code public void loadData(){ below the class declaration and above the
code we have just pasted into the class as shown in Figure 5. And place the closing brace for the new
method below the pasted code and above the class closing brace. The brace positions for the new method
are shown highlighted in yellow in Figure 5.
Make sure that the new method declaration is tabbed in once more than the class declaration, we are inside the class block. Also make sure the pasted code is tabbed in once from the method declaration that it is now inside. If we don't get the tabbing correct, the code would still run but it would be much less readable and difficult to follow when trying to find bugs.

Netbeans tries to be helpful with braces and tabbing. If you paste the line above into the text editor and press return, Netbeans will automatically put a closing brace in place for you and set your indented tab location for the next line of code within the new block. I say it tries to be helpful, it doesn't always do what you want, after all its not mind reading software its just an IDE! Be careful that Netbeans doesn't help you end up with too many closing braces though.
Tip: you can check brace pairs by putting your cursor on either the opening or closing brace, both braces in the pair will be highlighted for you.
Although we have placed our arrays in a new class inside a data load method we can't do anything with them. The arrays that are created inside the method are not available to anything outside of that method. They have method level scope.
We need to be able to access the data in our model so we need to change this scope. First of all declare
three new array variables below the class declaration and above any method declarations, this makes them
instance level variables, they will turn green in Netbeans to show this. Assign
null to each of the variables.
Unfortunately, we cannot declare the variables at one level and then use the declare, construct and
initialise notation in the method because the variables have already been declared at the instance level.
There is a way around this. Array variables are labels we put on an object stored in a location
in the computer memory. We can create the arrays locally and then assign an instance level label on them
and they become an instance level variable! Under each of the array declarations in the loadData
method we add a line to assign the locally declared, initialised and constructed array to our instance
variable.
The key word this simply means that we are using an instance variable form this
object. Notice the variables used after the key word this are all green.
This is all good but it hasn't helped our access to the data. All of our instance level arrays are
declared private which means nothing outside of this object can access them. So why do that?
Why not just declare them public? We may want to do some manipulation of the values coming out of the
arrays or check validity before we use them in the model. This is easier to do in one place, when we
access the data, rather than in multiple places when we request the data in other objects. Therefore,
we will use an accessor method to get at the data.
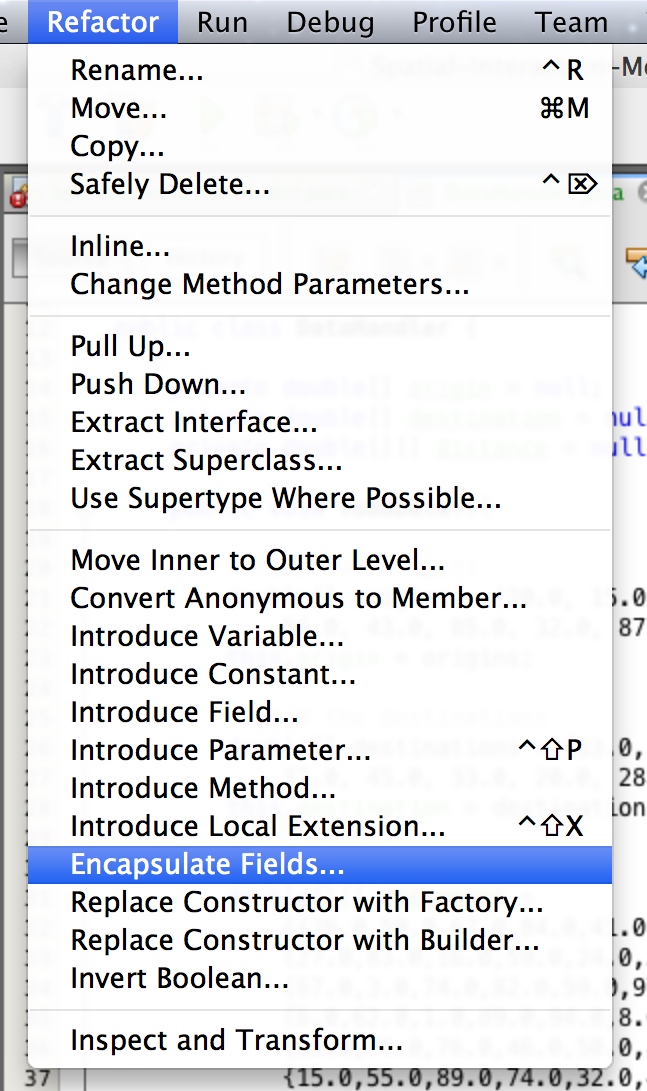
It is relatively painless to do this in Netbeans. Select the option to Encapsulate Fields... from the Refactor menu. There are lots of 'helper' items in the refactor menu but the encapsulate option is one of the most useful time savers.
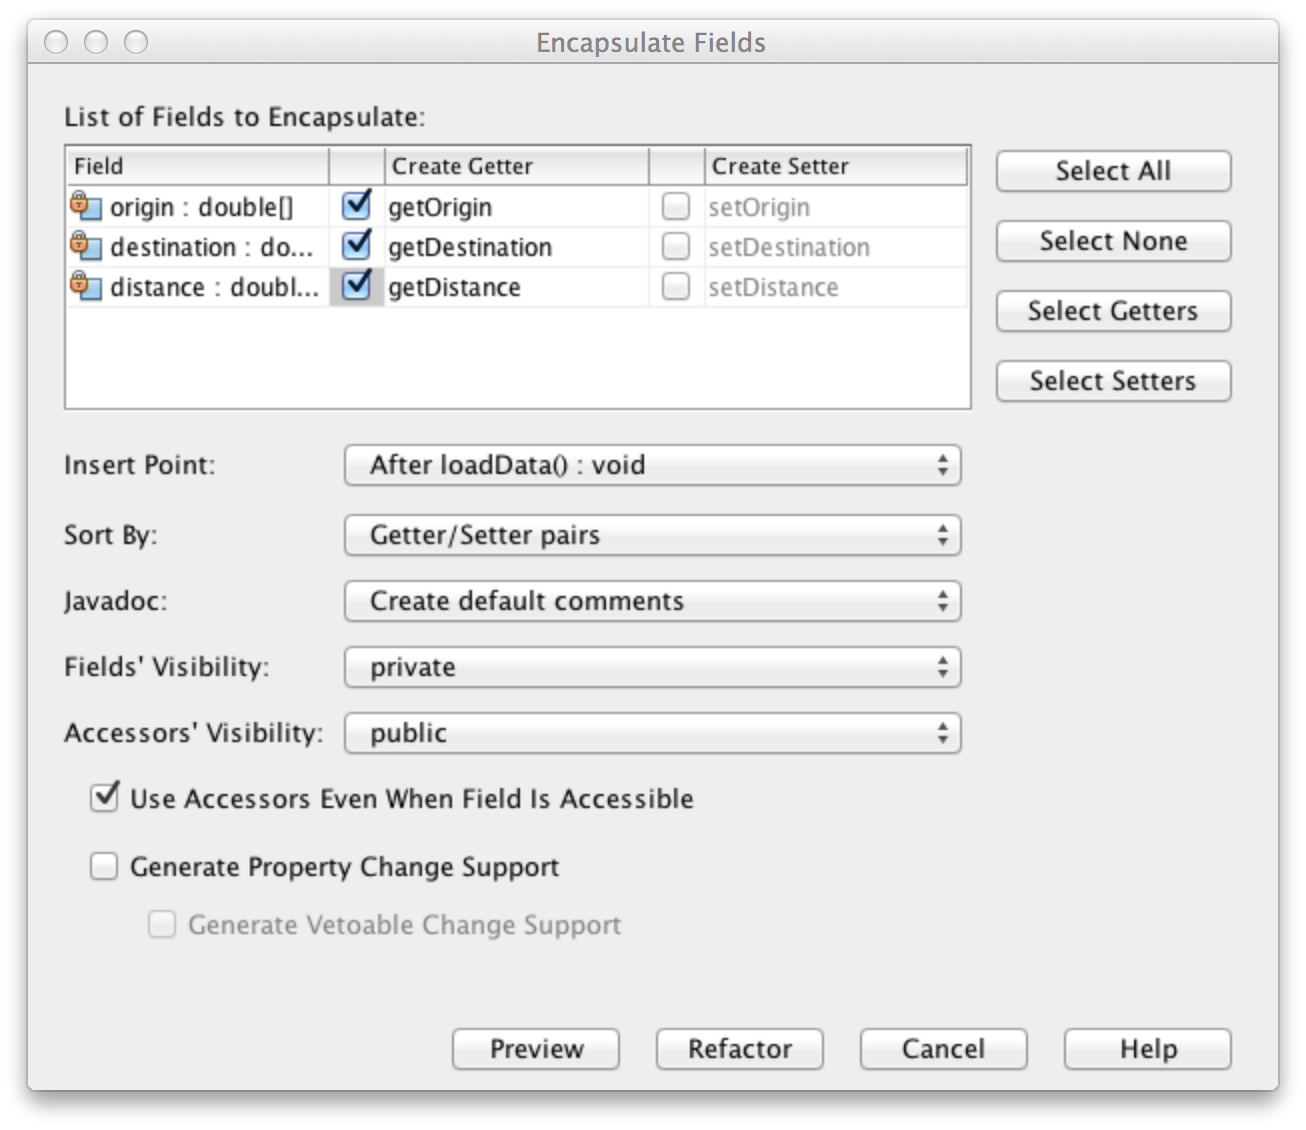
Once you have selected the Encapsulate Fields... option you will see the window in Figure 8. We only want to be able to get data not set it, so check the three boxes next to the variables in the Create Getter column. Select the Insert Point: to be After loadData() : void. leave the rest of the options as the default making sure the Fields' Visibility: (variable) is private and the Accessors' Visibility: (the method created to access the variable) is public.
Once you are done click Refactor.
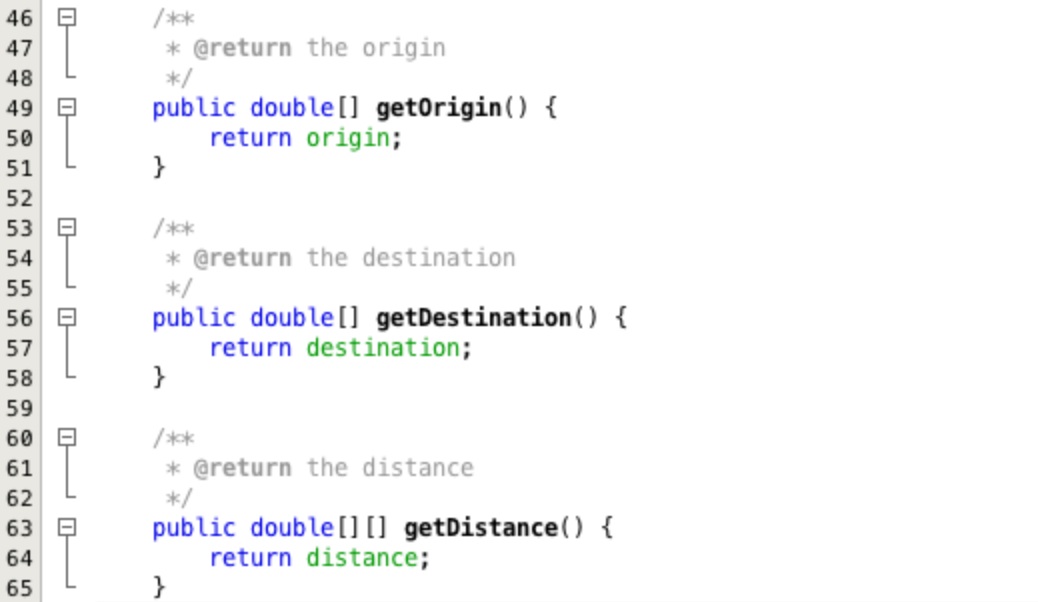
You should now see three new methods below the dataLoad method that we added that have been
automatically generated by the IDE for you. This is good but the comments are poor, add a little more
description.
Returning a two dimensional array for the distances ties our code to always having an array to return. However, if we wanted to calculate the distances between origin and destination points as a Euclidean distance at runtime, a common approach, then the array may not exist.
To get around this we are going to adapt the accessor method to return a single double value for the
distance between two points identified by two parameters of the origin and destination. If a user
presents a parameter value that falls outside of the valid index values an IndexOutOfBoundsException
would result.
To ensure this situation does not arise we test each index parameter to make sure it is valid. If either is invlaid -1.0 will be returned by the accessor method. See Figure 10 for the detailed code changes and accompanying comments, implement these changes in your accessor method.

Adjusting the Model Code:
Create a second new empty class called Model, following the same process as
above with the DataHandler class. Create two methods in the new class called calculate and
calculateBalancingFactors.
Declare the calculate method as a void with public access.
Declare it so that it takes in two parameters alpha and beta both of type
double.
Declare the calculateBalancingFactors method as a void with private
access. Declare it so that it takes in two parameters originChanged and
destinationChanged both of type boolean.
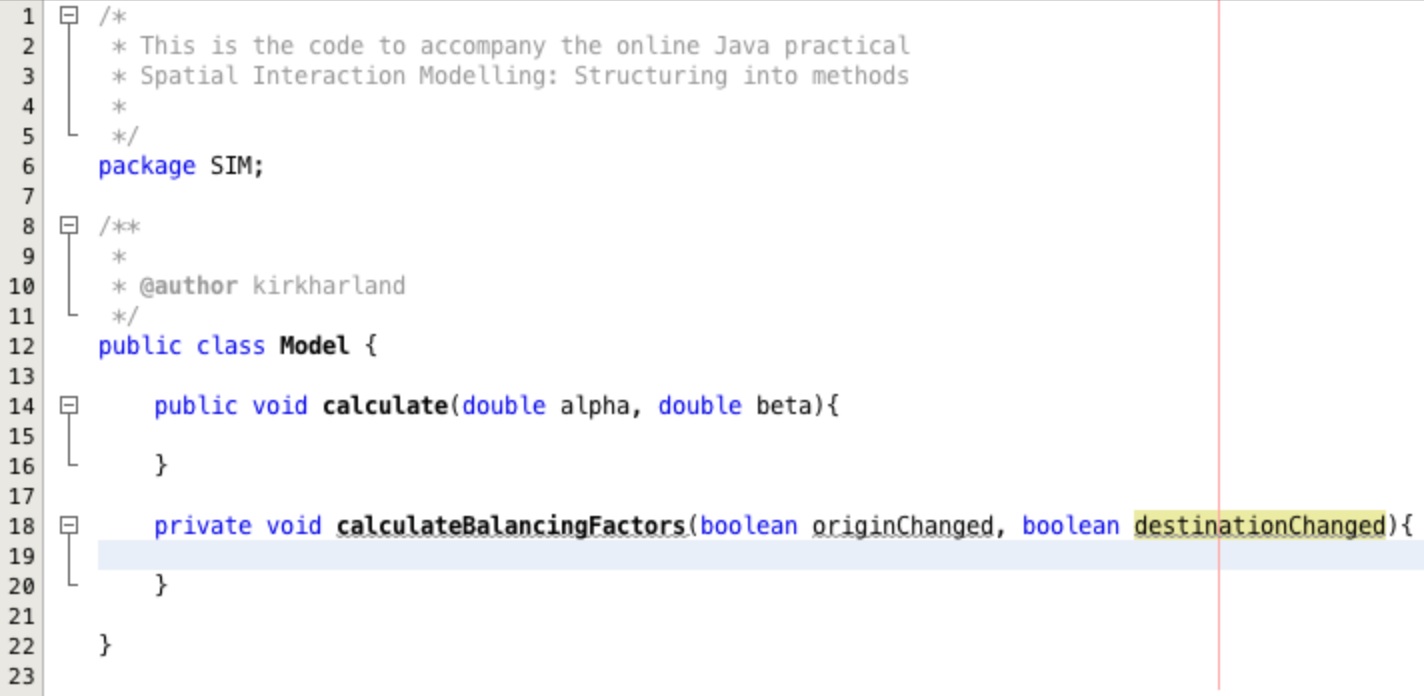
Have a go at creating the methods yourself, when you have finished your class should look something like the one in Figure 11.
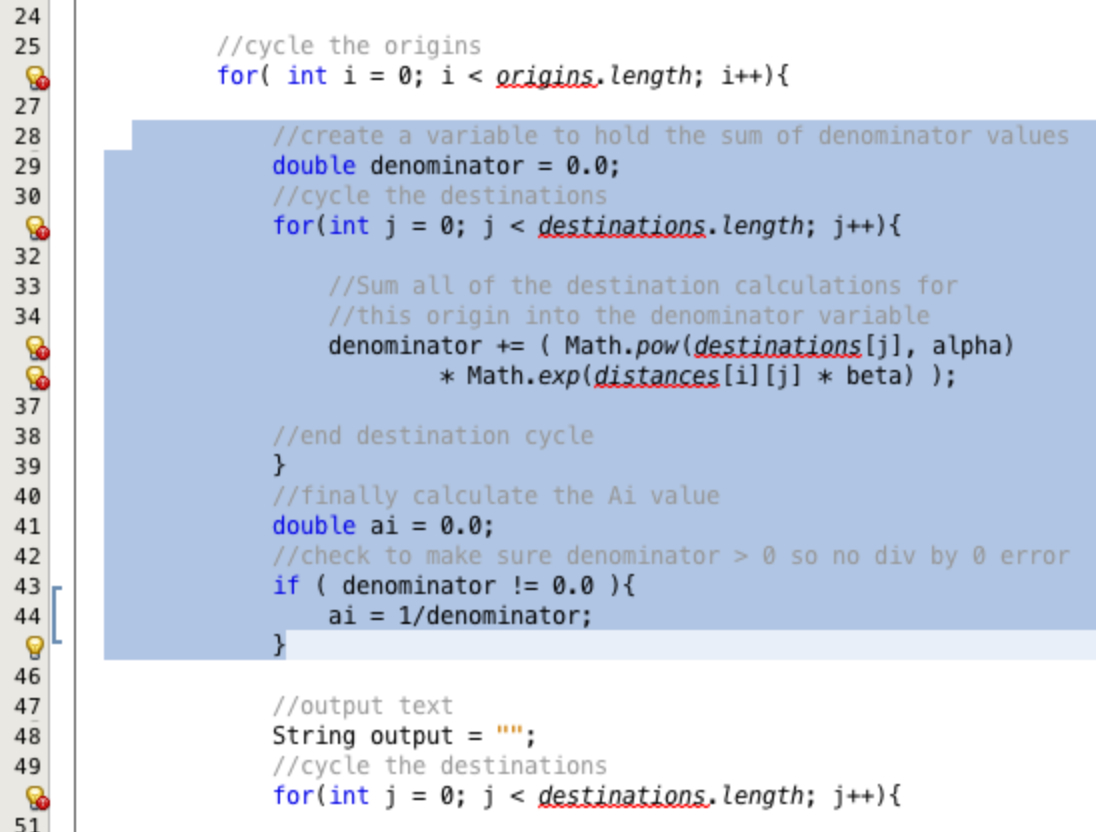
Cut the code that calculates the Ai balancing factor out of the class SpatialInteractionModel
shown highlighted in Figure 12.
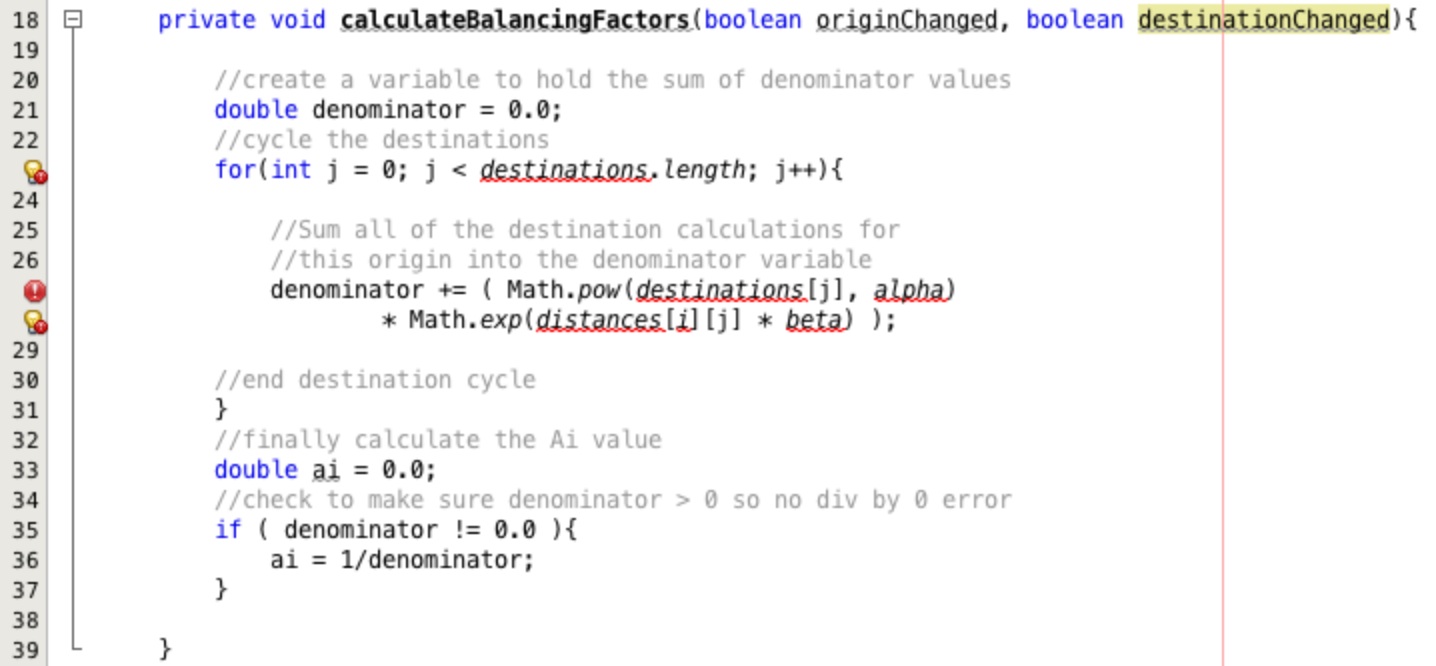
Paste the code into the calculateBalancingFactors method in the new Model class
as shown in Figure 13. Make sure that the code is tabbed to the correct indentation within the method
block.
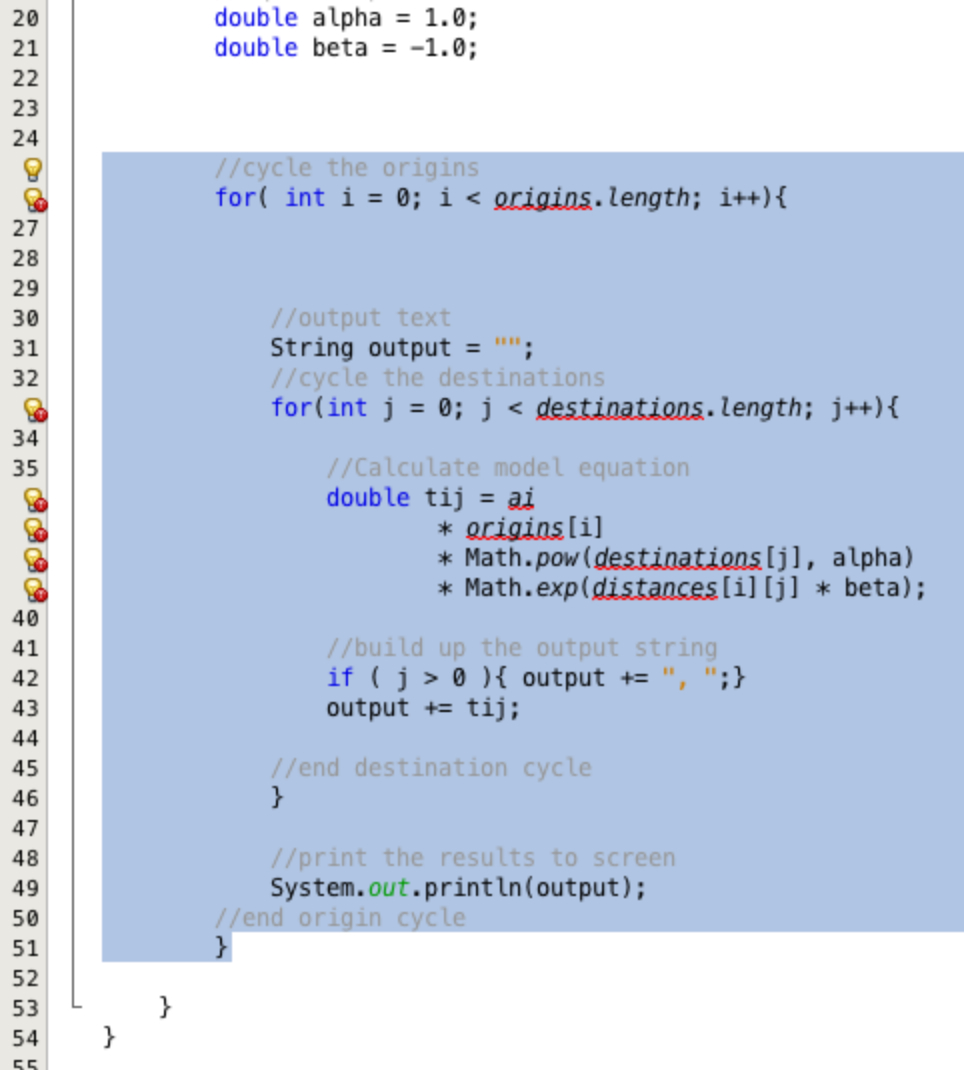
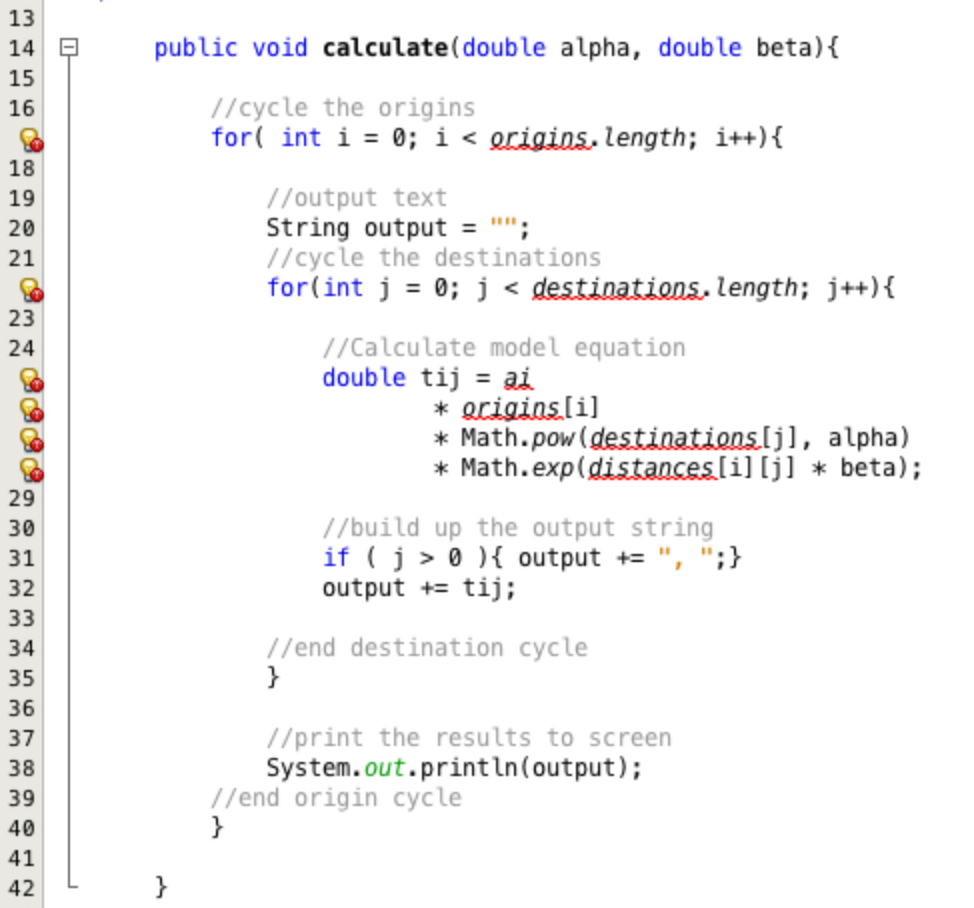
Cut the remaining model equation out of the SpatialInteractionModel class as shown in Figure
14.
Paste the code into the calculate method in the new Model class
as shown in Figure 15. Make sure that the code is tabbed to the correct indentation within the method
block.
This first section of the practical has dealt with splitting the spatial interaction modelling code into two different classes. One to run the model and one to deal with the data loading and provide controlled access to the data.
The next section of the practical will walk through the stages required to complete the refactoring process removing the errors introduced through splitting the code across two different classes.