Basic Agent-Based Modelling and Inheritance
[Practical 6 of 11 - Part 1]
Model Creation:
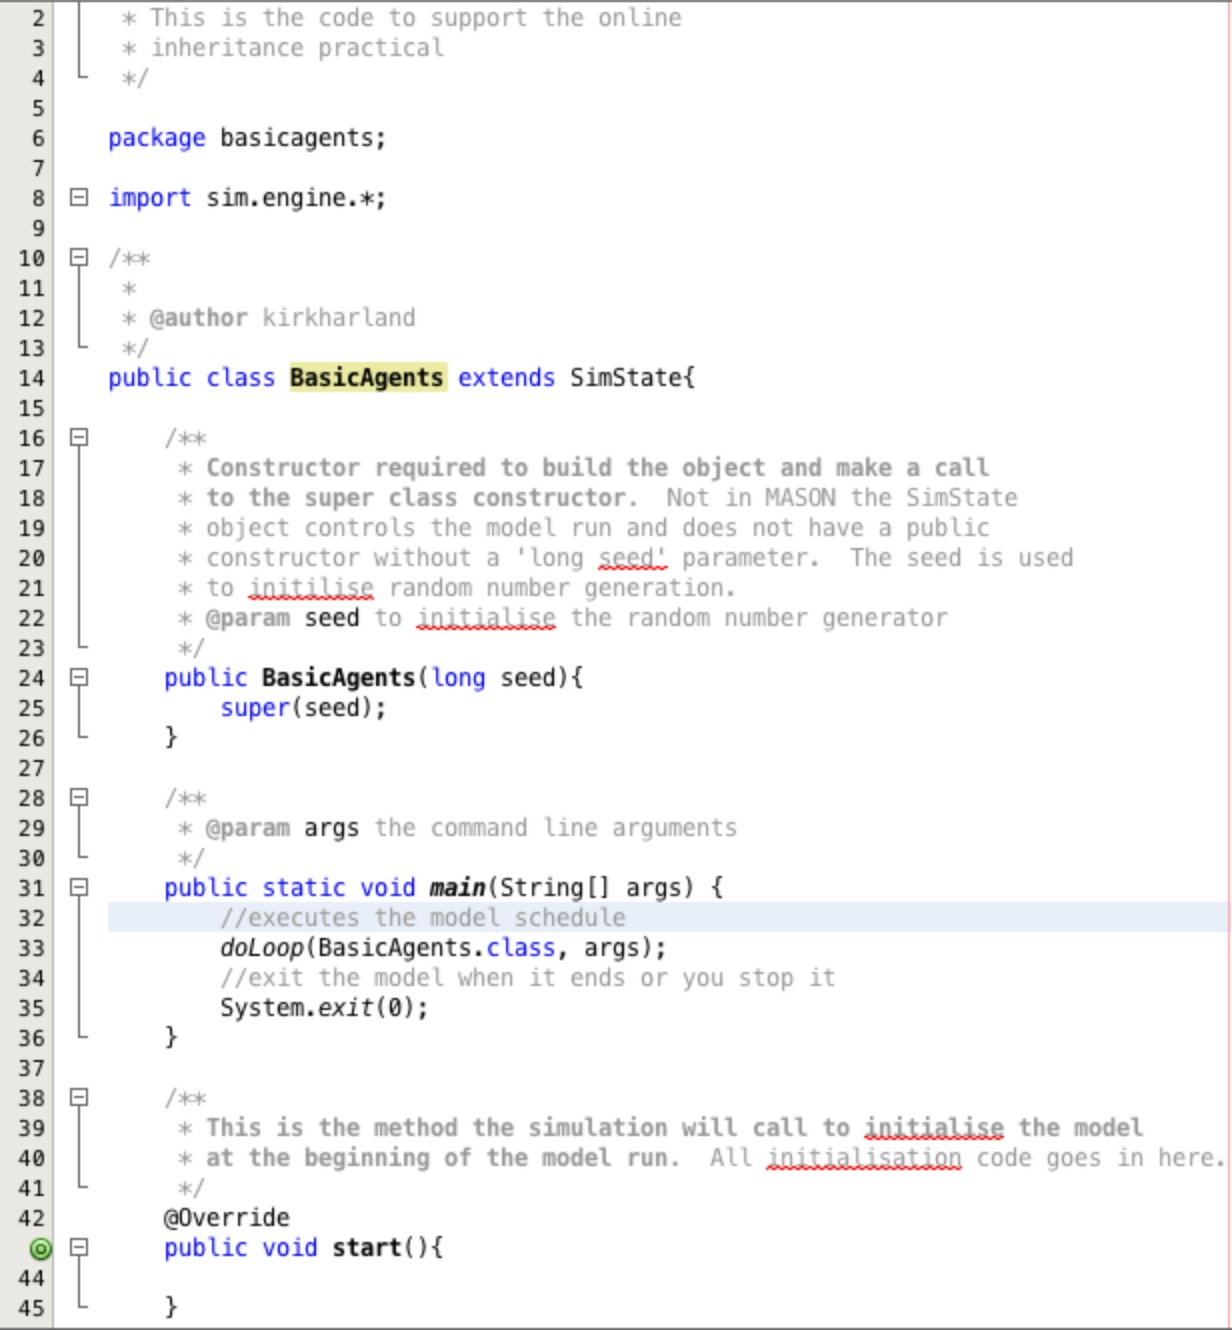
First we need to create a class to control the model. We will use our BasicAgents class. Add a line to
import sim.engine.*; as shown in Figure 4. Add the extend SimState code after the class declaration,
this makes our BasicAgents class inherit the code to control the model from the MASON class
SimState.
Add the constructor to enable the class to be instantiated. The super class does not have an non-paramaterised default constructor available so we will get a compile error if this constructor is not present to call the available super class constructor.
Add in the doLoop and System.exit lines which will make the model loop through time steps and
exit correctly when terminated.
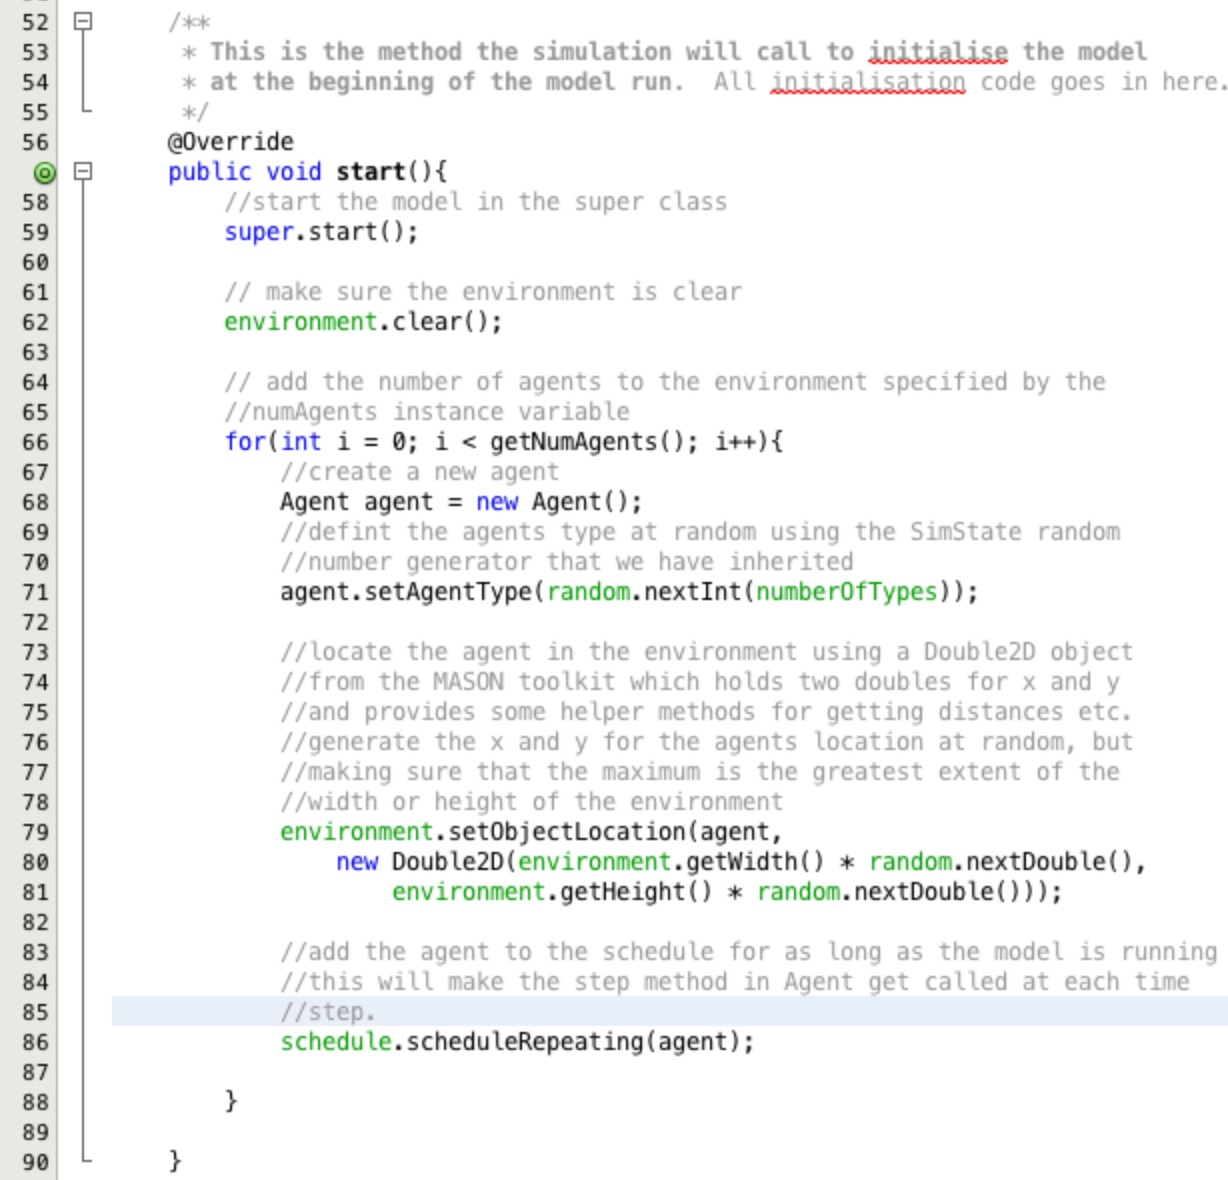
Now add in the public void start() method which is where we initialise our model. This is the method called
by the MASON toolkit when the simulation starts before any time-steps are taken.
Your model will compile and run but it won't do much. We haven't got any agents or parameters to base our rules on.
Add in the instance variables shown in Figure 5. Thje first one, environment, will provide the area for the
agents to navigate. When prompted click to import sim.field.continuous.Continuous2D;.
The remaining variables will provide a mechanism for dynamically adjusting the rules of the model. The comments above the instance variable declarations describe how they will act in the model.
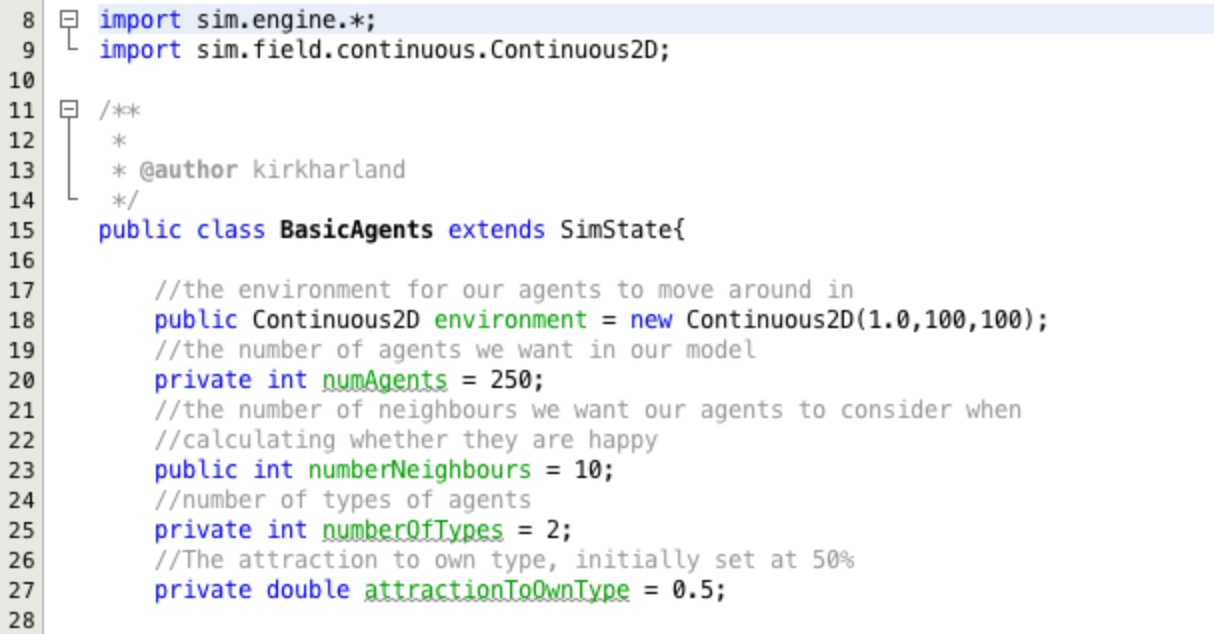
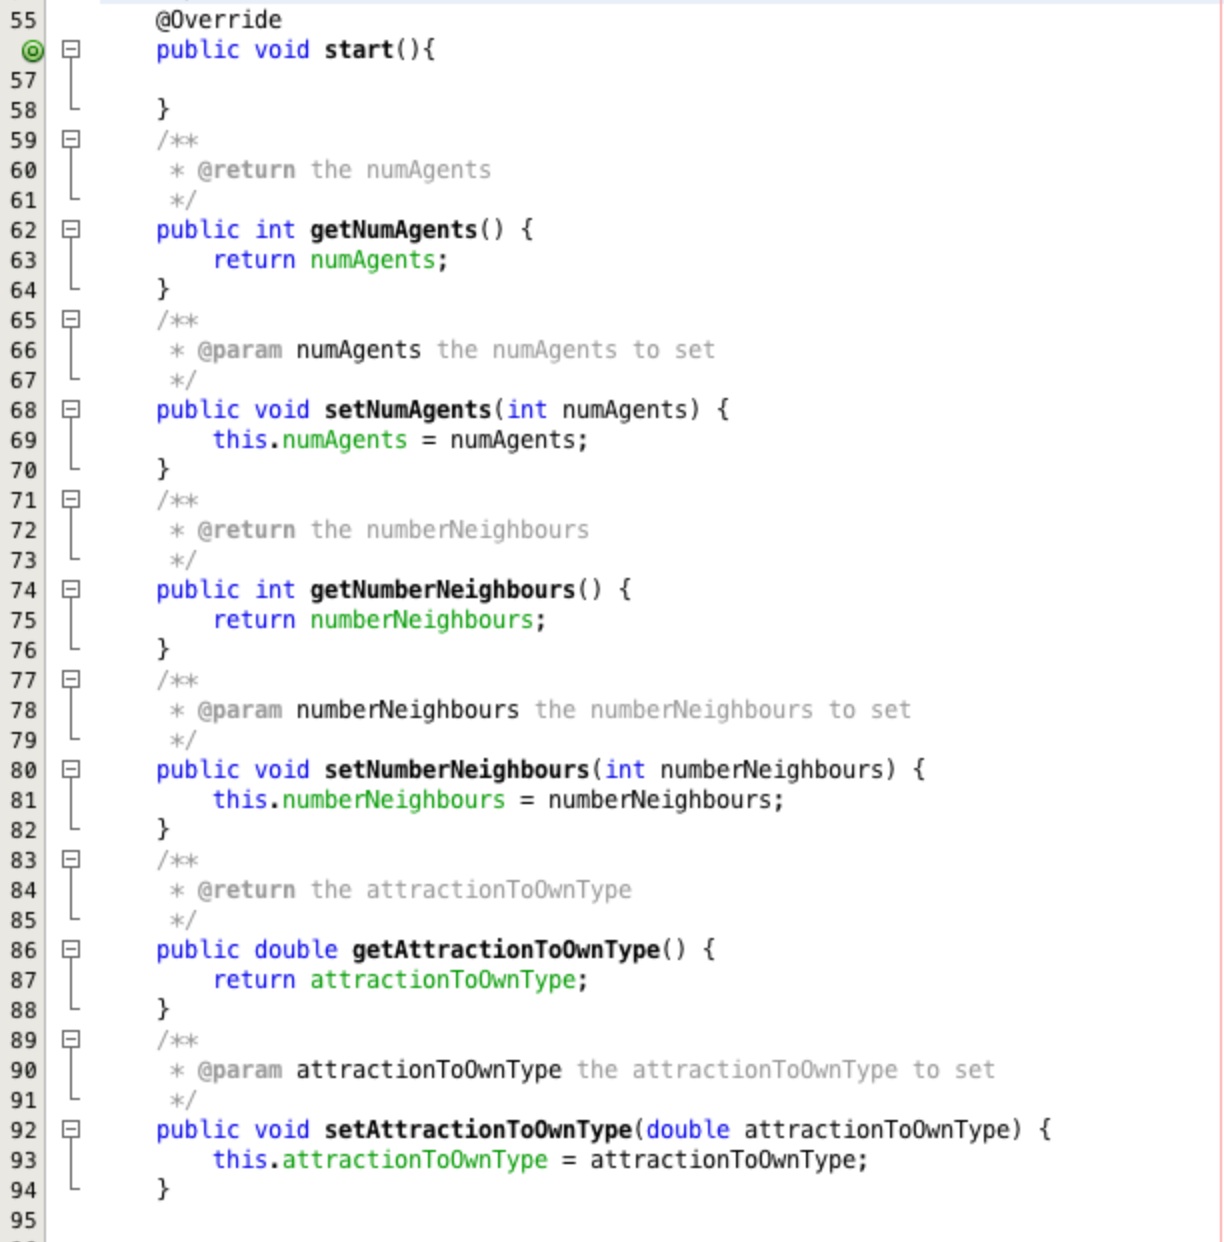
Use the Refactor menu to Encapsulate Fields... for the three instance variables
numAgents, numberNeighbours and attractionToOwnType. You should end up with
auto-generated code like that shown in Figure 6.
Creating Agents:
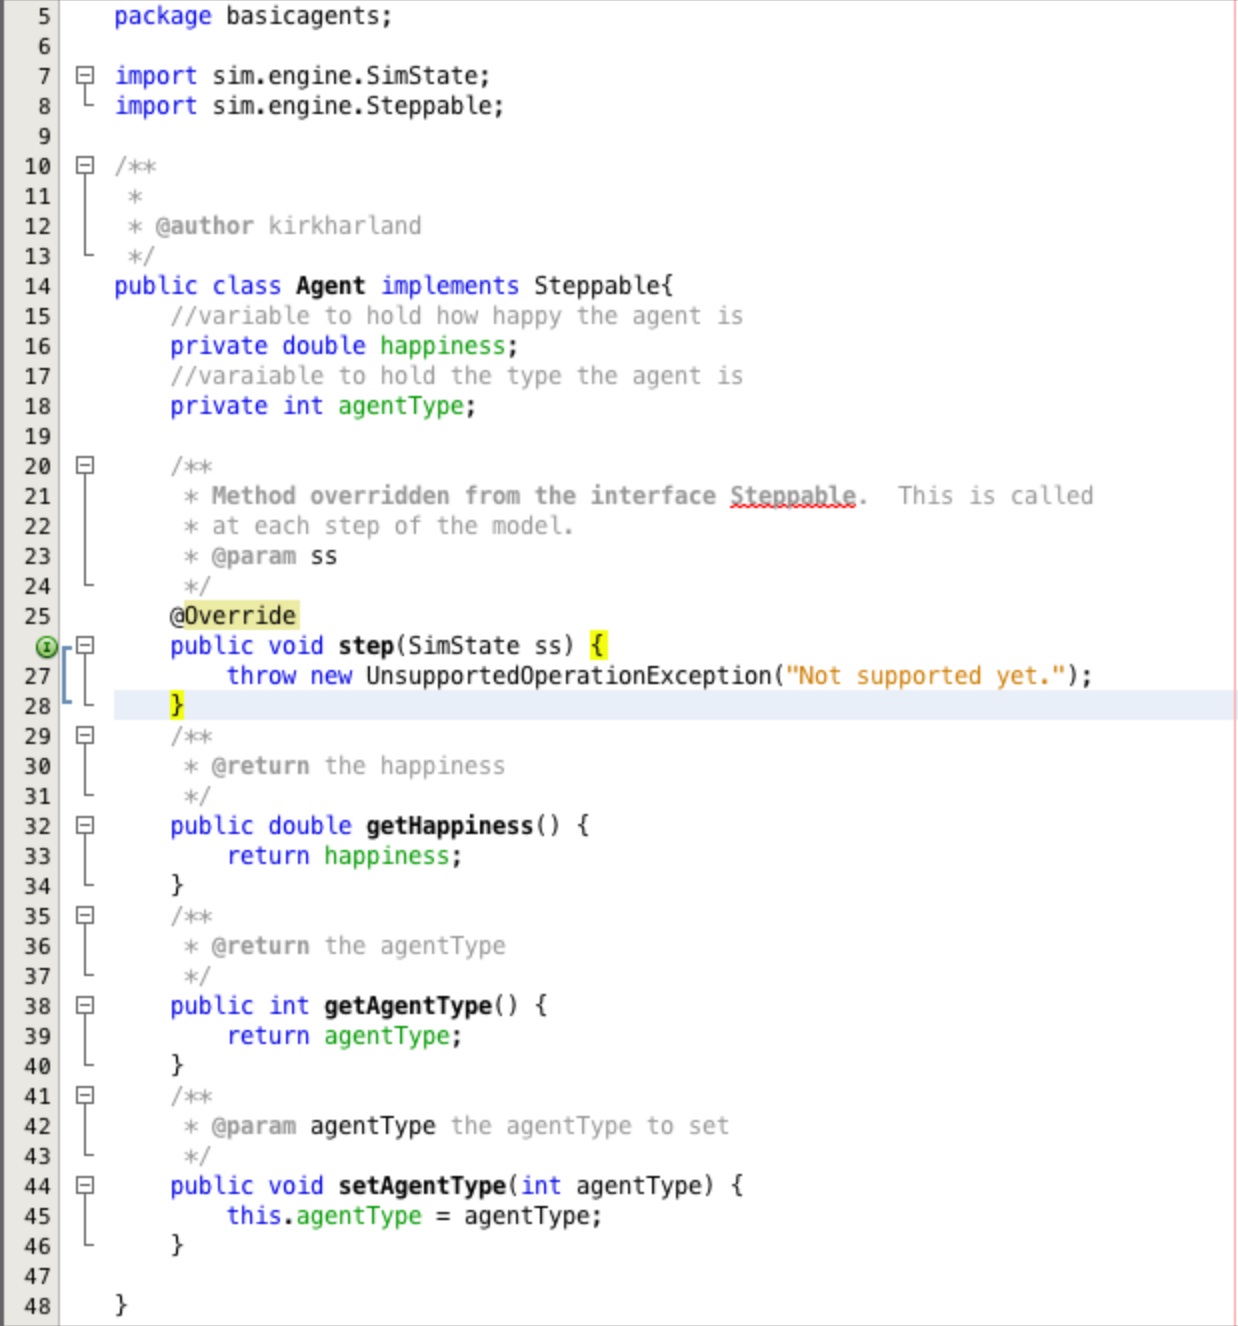
Create a new class called Agent. Add the implements Steppable code after the class
declaration, and add the import sim.engine.Steppable; when
prompted to do so by the IDE.
You will need to override the method public void step(SimState ss), this
is the only method required by the Steppable interface and it is the method called for each agent at
each step of the model. When you override this method you will need to add the import sim.engine.SimState;.
Add two instance variables to hold the agents happiness and their type. Using the Refactor >> Encapsulate Fields... option create mutator methods to get and set the agent type but to only get the agents happiness. We don't want the happiness to be set from outside, we want the agent to calculate this internally based on their surroundings.
You should end up with a class that looks something like that in Figure 7.
Adding Agents:
Add the code shown in Figure 8 to the Start method in BasicAgent class. The comments above each
line of code explain what the line is doing. When adding the agent to the environment variable with a
random location you will be asked to import sim.util.Double2D;, add this with the other imports above the
class declaration.
This method calls the super class start method and then clears any objects from the
environment variable. The required number of agents are created, given a random type and added to
the environment at random locations.
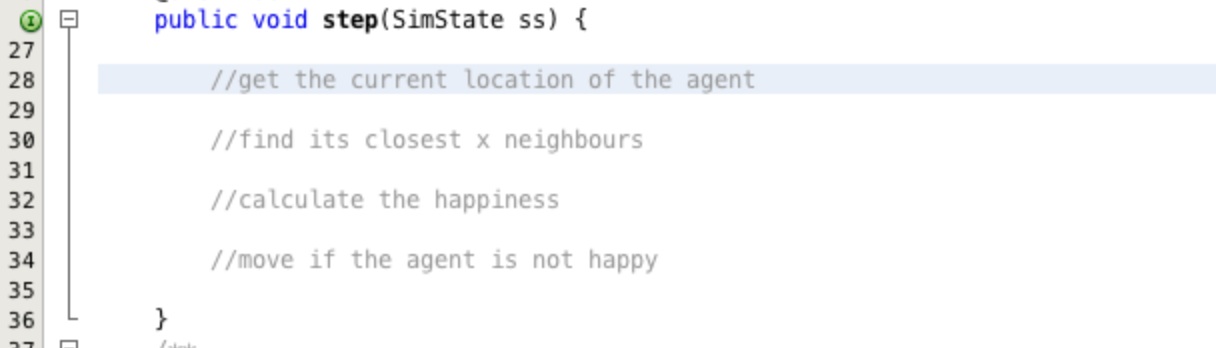
Adding Agent Actions:
We need to decide what we want the agents to do.
- We need to find their location in the environment
- Locate their nearest x neighbours
- Calculate if they are happy where they are
- If they are not happy move towards a happier location
Add these headings in as guides to structure the code as in Figure 9.
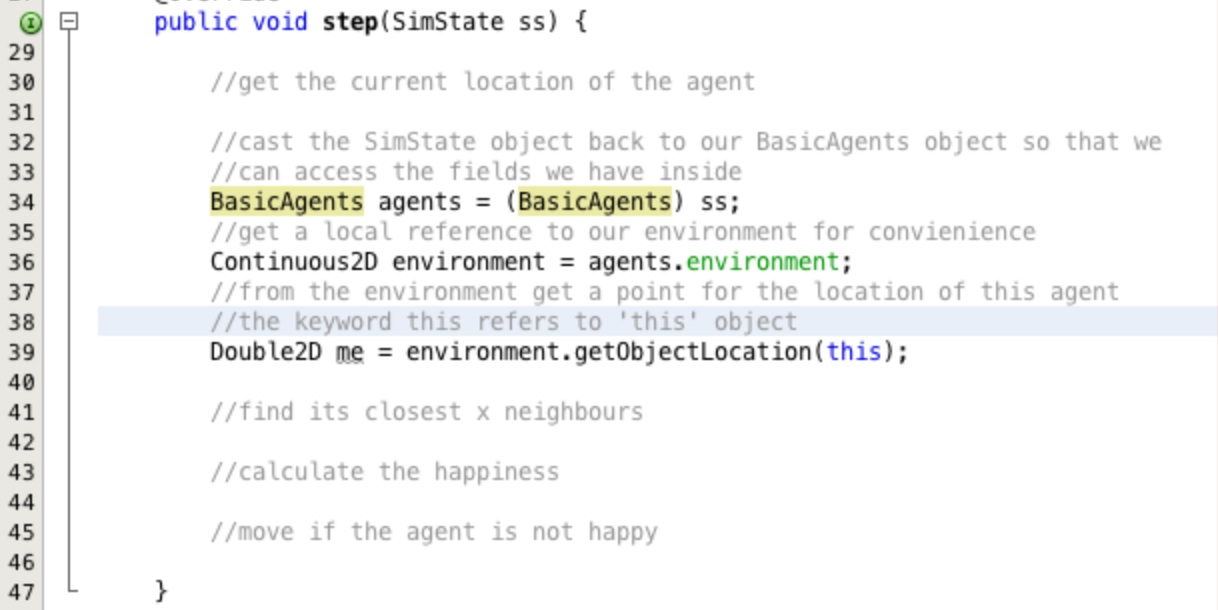
Add the code as shown in Figure 10 to get the location of the current agent. The comments above each line explain what each line is doing.
Add the import sim.field.continuous.Continuous2D; and import sim.util.Double2D;
when prompted by the IDE.
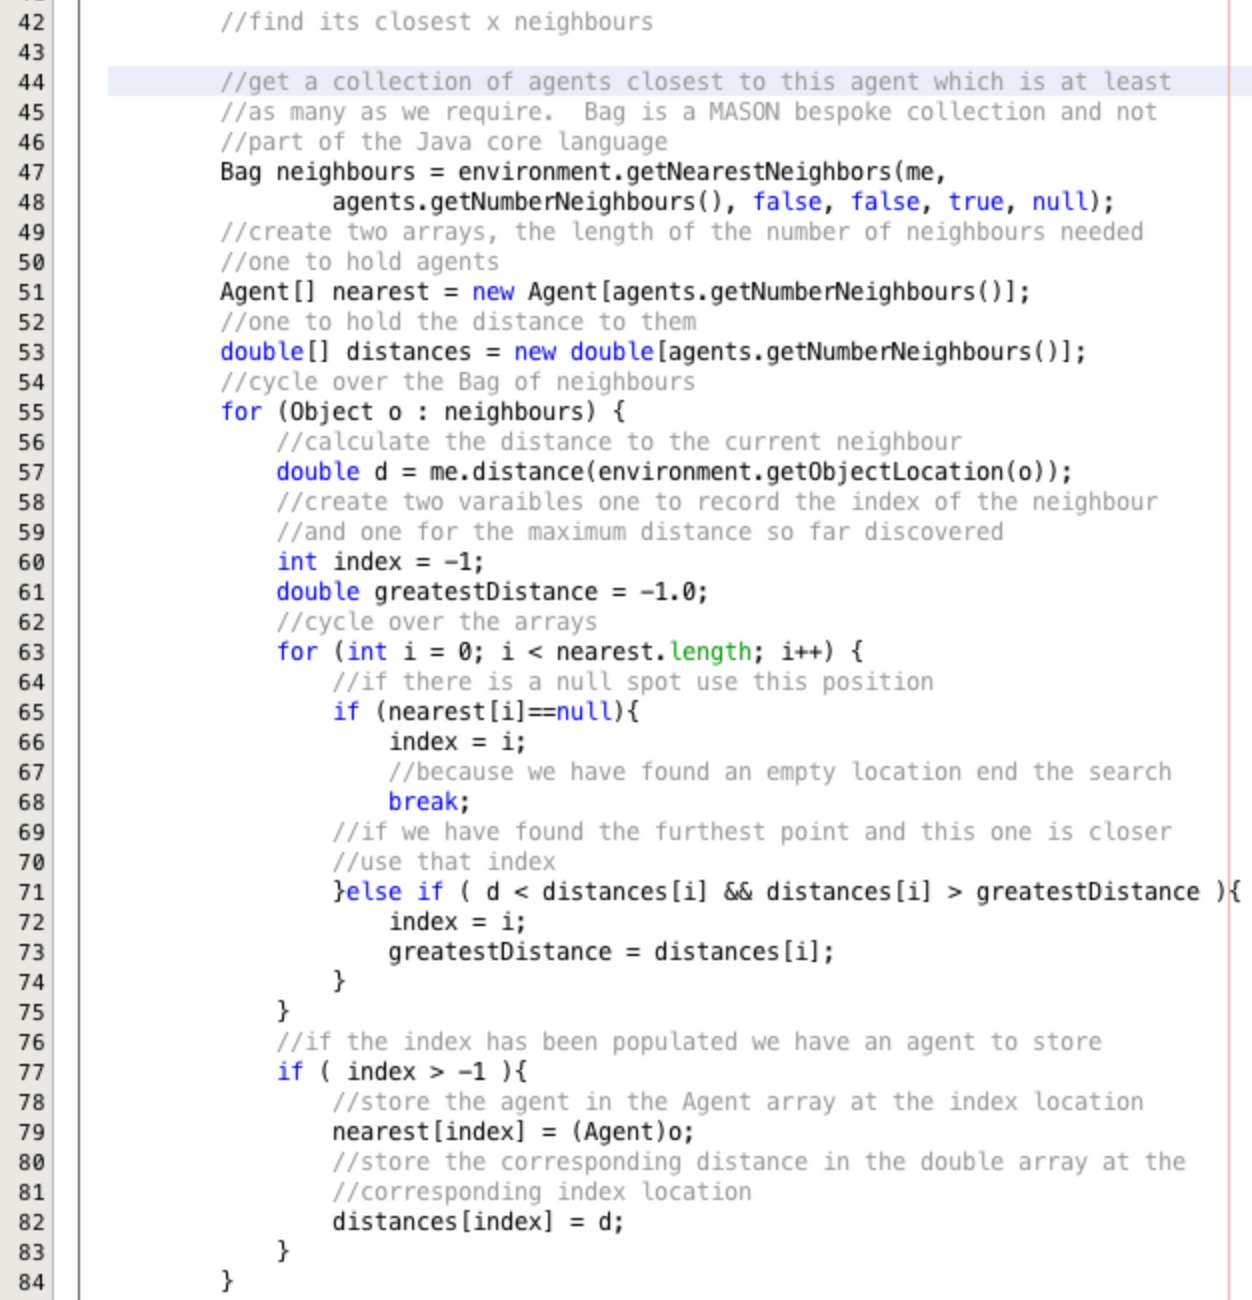
Next the agent needs to examine its closest neighbours, the number to be examined is dictated by the parameter from
our BasicAgents class, numberNeighbours. Insert the code shown in Figure 11 into under our
comment //find its closest x neighbours. Again the comments contain quite detailed explanations
of the code.
The call to get the getNearestNeighbors returns at least the number requested in an object called a
Bag. This Bag object is a bespoke collection in MASON. The returned Bag may (and normally
does) contain more neighbours than required, we need to cycle through them and ensure that we keep only the required number of
closest neighbours.
The code between lines 51 and 84 does this by simply keeping two arrays in sequence, one with the neighbour agent objects in and the other with the distances. When an agent is found closer than a current neighbour, the current neighbour is replaced in the array by the agent.
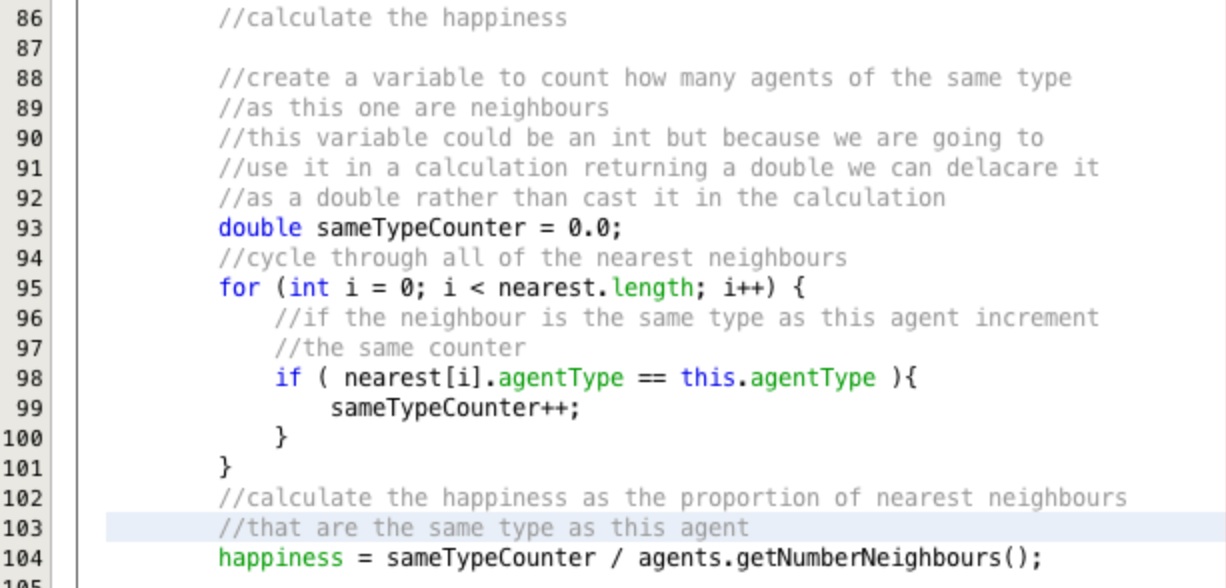
Using the array of closest neighbours the agents happiness can now be calculated. Insert the code shown in Figure 12 below the //calculate the happiness comment we added earlier. Read the comments for a line by line explanation of the code.
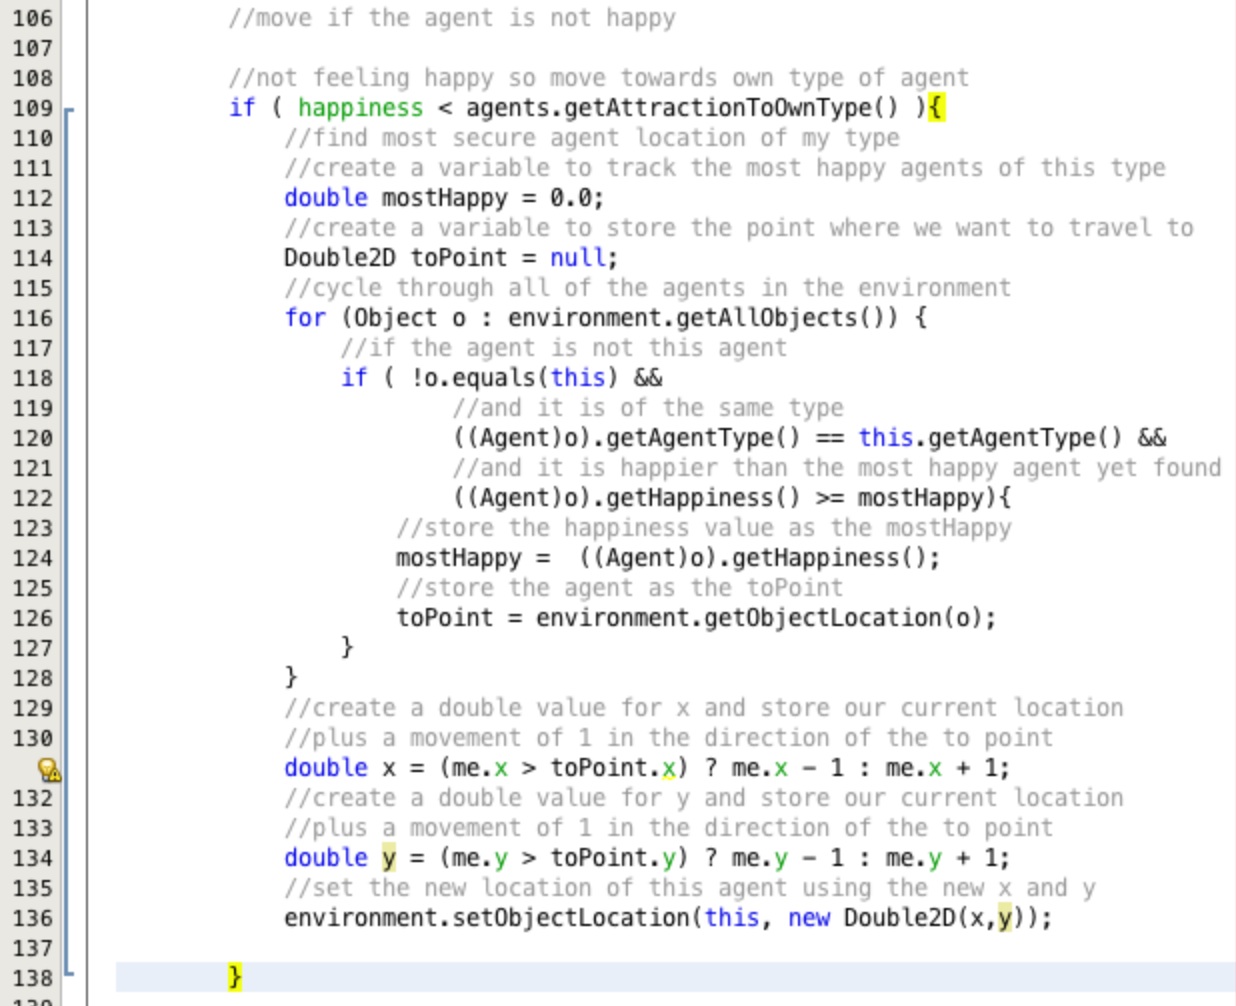
Insert the code in Figure 13 below the comment //move if the agent is not happy. This code assesses if the agents happiness is less than the desired happiness, i.e. the number of proportion of like type agents is less than the set threshold move towards more agents of your type. If it is it locates a point where like type agents are much happier and starts to head that way.
Running the Model:
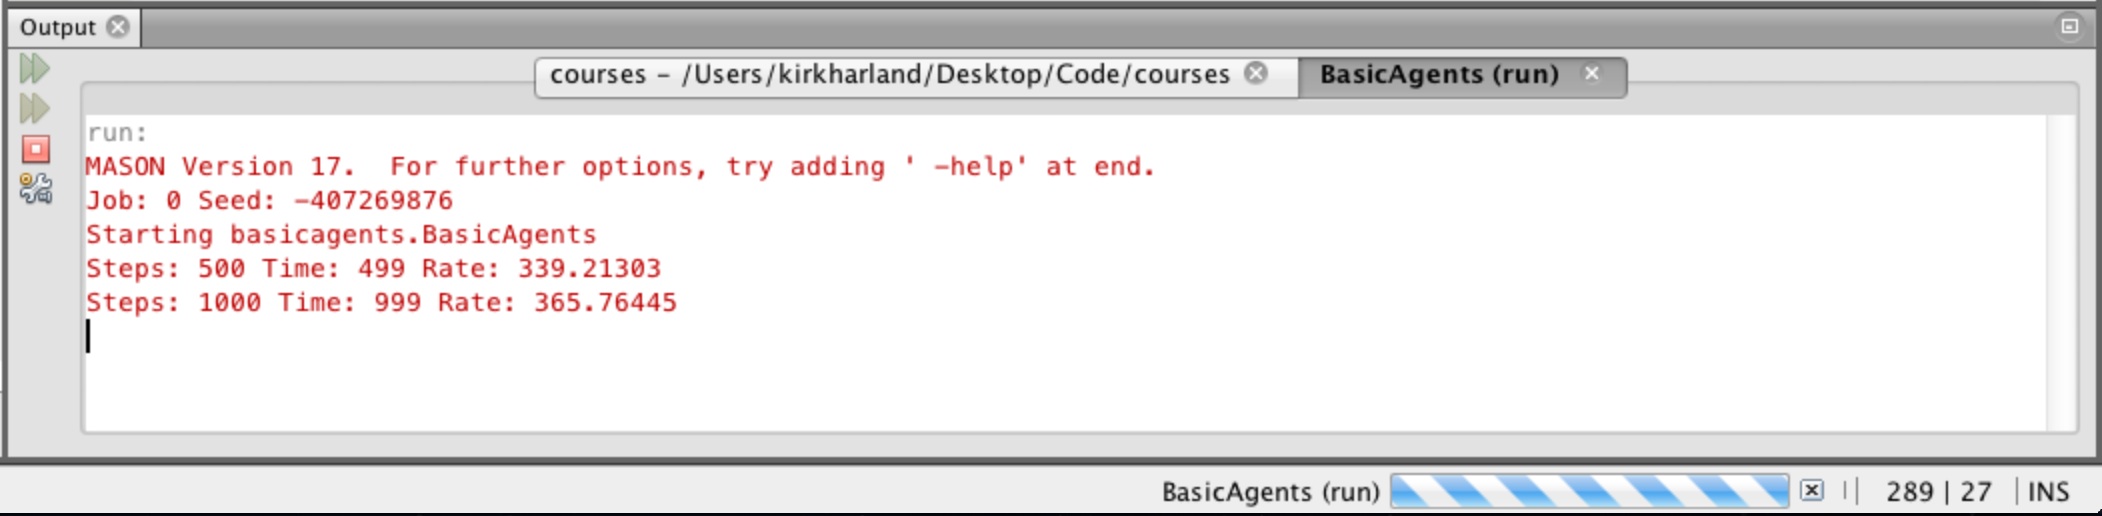
We can run this model by right clicking the BasicAgents file and selecting Run File.
You will get an output like the one shown in Figure 14.
This is great, it shows that the model is running, however it isn't very visual or interactive. To stop the program running click the cross-hair close button next to the blue and white progress bar at the bottom of the screen.
This part of the practical has built an ABM but it is not easily interpreted. The next part will incorporate a more visual interaction with the model through the power of inheritance and object orientated programming.