GUI Practical
[Practical 9 of 11]
Create an Empty GUI:
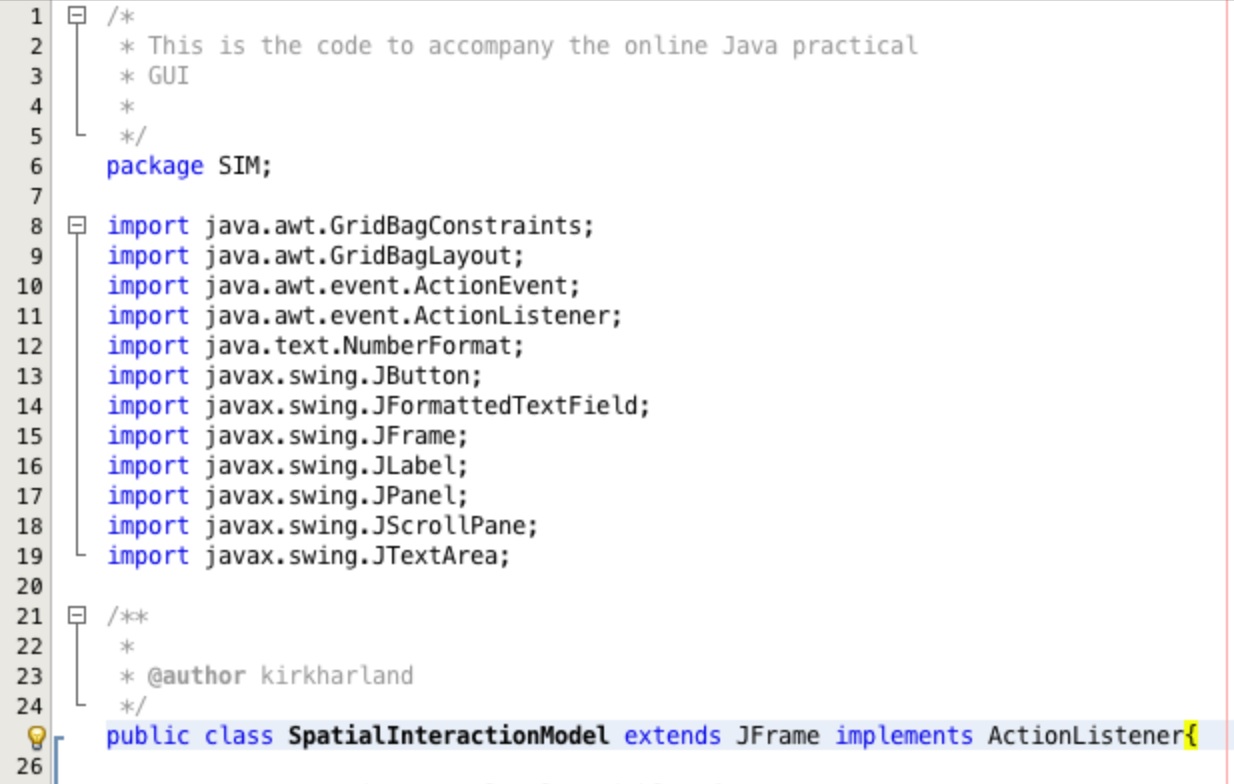
In the SpatialInteractionModel class add the imports we will require
for this section:
import java.awt.GridBagConstraints;
import java.awt.GridBagLayout;
import java.awt.event.ActionEvent;
import java.awt.event.ActionListener;
import java.text.NumberFormat;
import javax.swing.JButton;
import javax.swing.JFormattedTextField;
import javax.swing.JFrame;
import javax.swing.JLabel;
import javax.swing.JPanel;
import javax.swing.JScrollPane;
import javax.swing.JTextArea;
extend the class to inherit JFrame and implement(s) the
interface ActionListener as shown in Figure 1.
When prompted to do so select to add all abstract methods which should leave you with the auto-generated code shown in Figure 2.
Delete the default error raised in the auto-generated code highlighted in Figure 2.

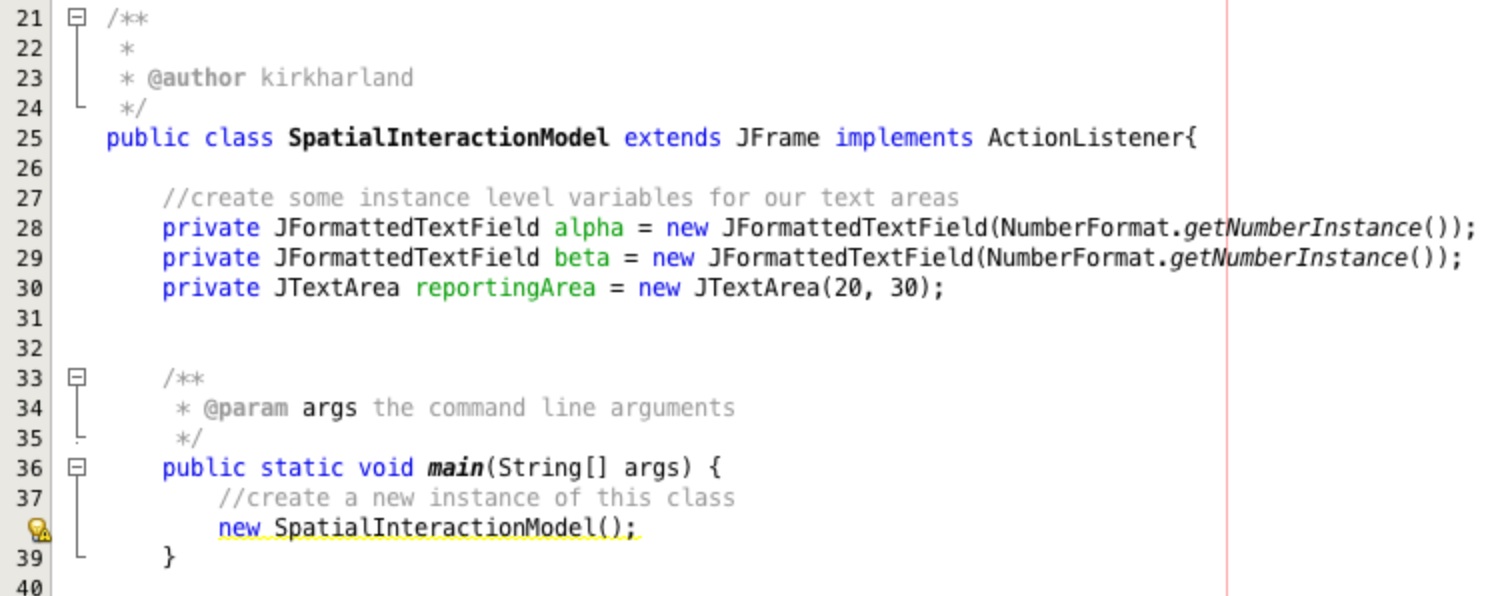
Add three instance variables to provide the controls we will use to enter our parameters and to report results back to us and
delete all of the code in the main method. Replace it with a single call to create a
new SpatialInteractionModel(); as shown in Figure 3.
Adding GUI Controls:
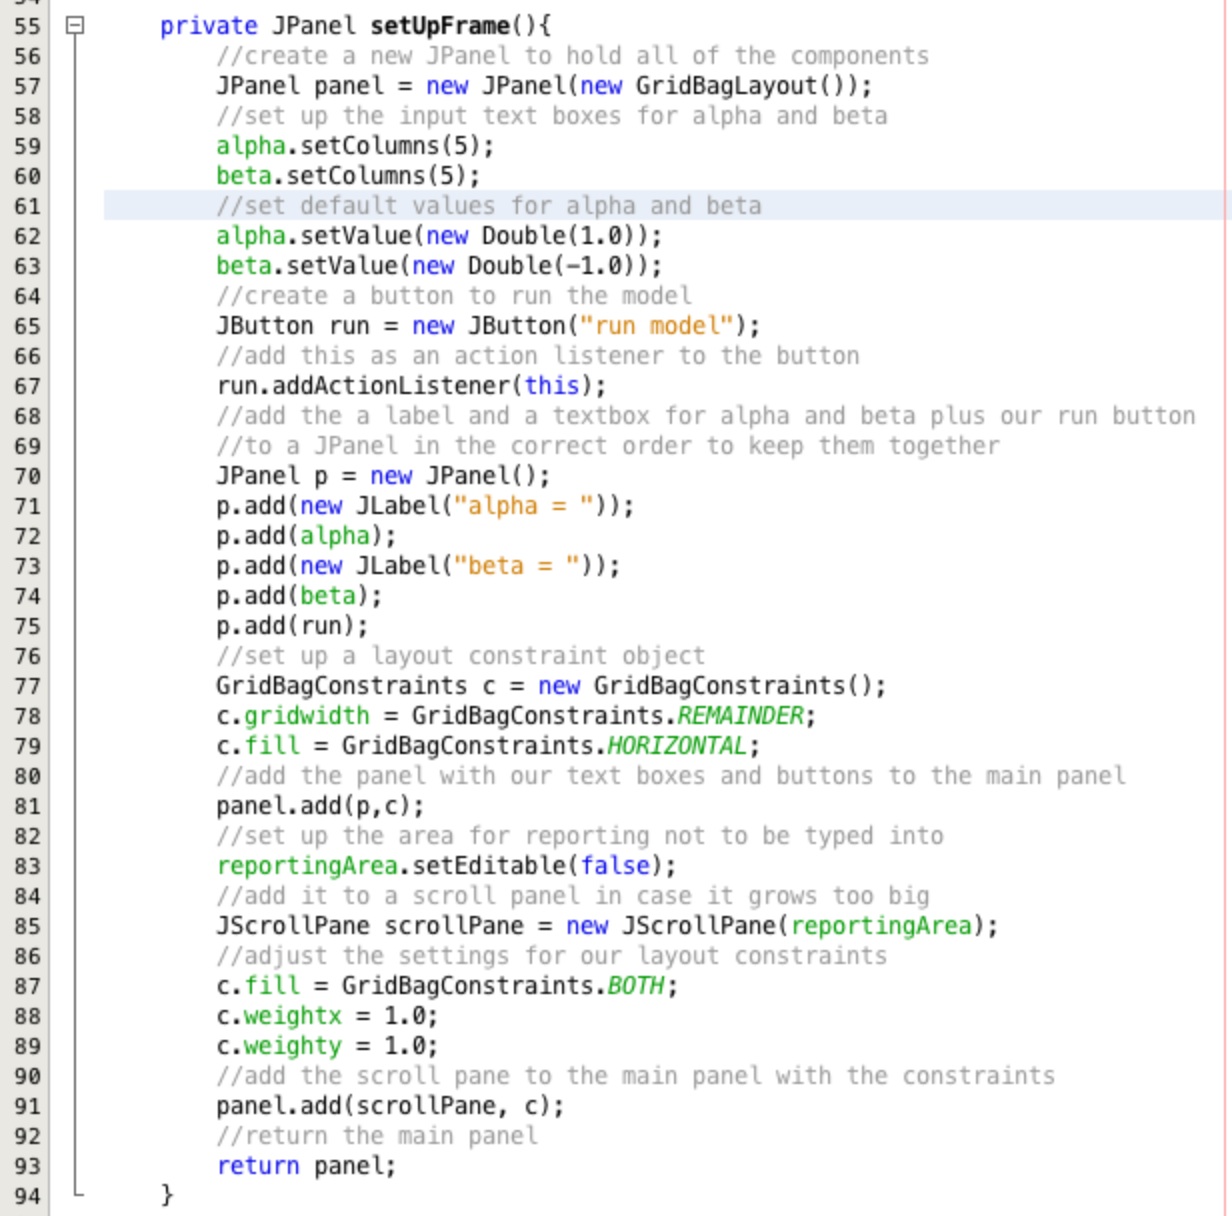
Create a new method called setUpFrame in the SpatialInteractionModel class. Populate the new method
with the code shown in Figure 4. This sets up all of our controls for the user interface.
Notice that the method returns a JPanel object which is a container for holding graphical user interface
controls.
We call the addActionListener method on the run button with this being passed as the parameter.
We can do this because we have implemented the ActionListener interface in the
SpatialInteractionModel class . The ActionListener interface is a 'contract'
that this object will provide all of the methods required by the button to inform us when the it is pressed.
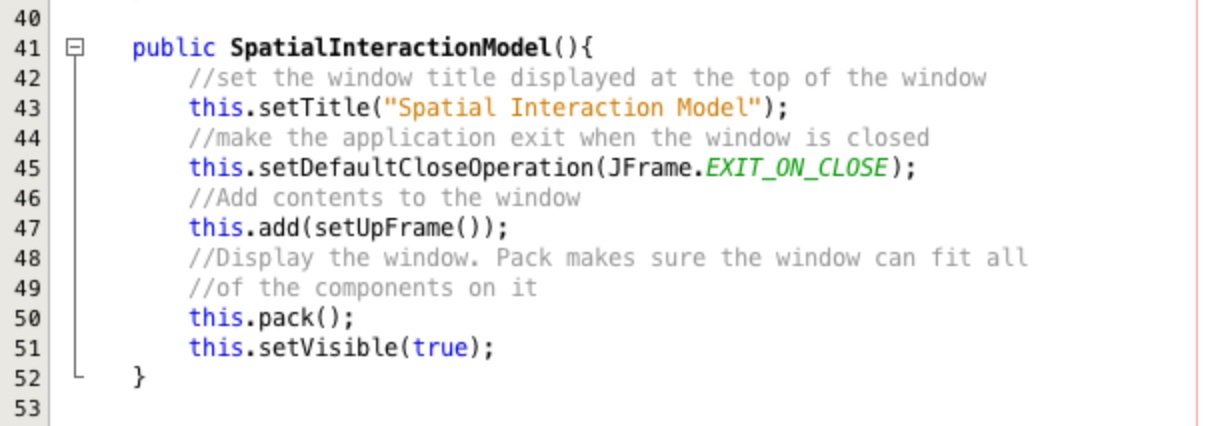
Create a default constructor like the one shown in Figure 5. Notice that we are using the keyword this to
access things in the object that do not appear in the class. These are methods that have been inherited from
JFrame when we inserted the code extend JFrame after the class declaration.
Also notice that we this.add(setUpFrame()); which adds the JPanel object with all our graphical
user interface controls setup and returned by the setUpFrame() method.
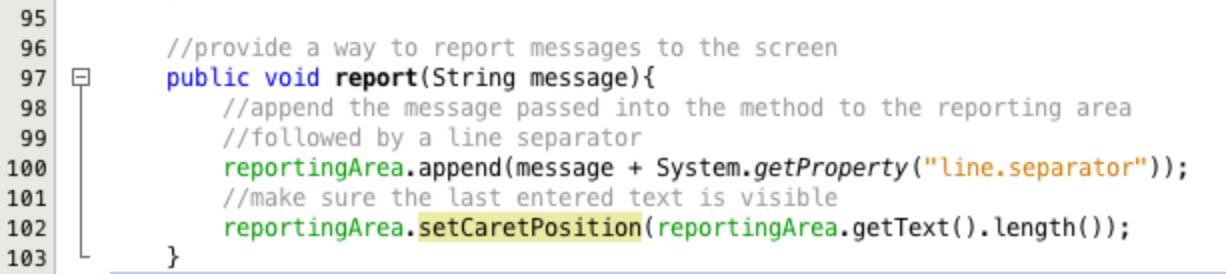
Create a method in the SpatialInteractionModel class to allow messages to be reported to the screen as
shown in Figure 6.
The last line in the method ensures that the last text appended to the screen is visible.
Listening for Button Actions:
Add the code shown in Figure 7 to the actionPerformed method.

Now compile and run the code. You should see a screen like the one in Figure 8. Each time you click on the
run model button the values in the parameter text boxes are printed in the reporting area. This is
because each time we click the button the actionPerformed method is called in this object.
Remember we added this to listen for actions on the button.
Try and type in some text into one of the parameter boxes. Each time you navigate away from the text box it will revert back
to the previous valid number. This is because we created them as new JFormattedTextField(NumberFormat.getNumberInstance()).
This means that they will not except anything but valid numeric values which means we can run our model knowing we will only
get numbers as parameters.

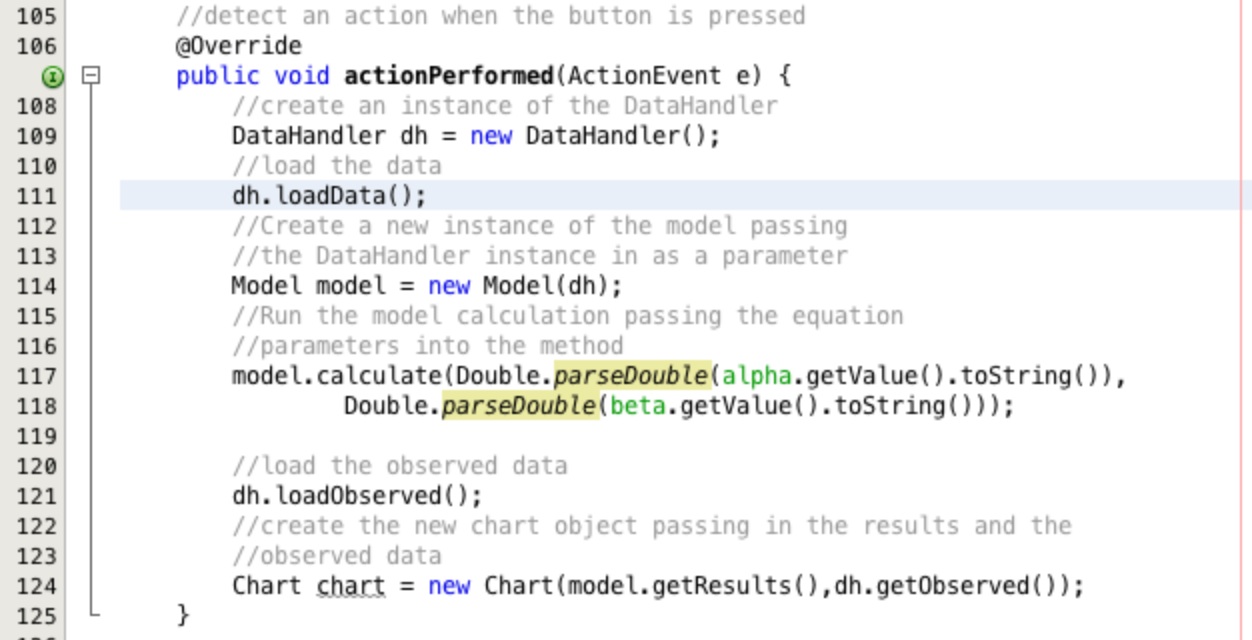
Connecting the GUI to the Model:
That is all great fun but lets link our model to the GUI we have created. Adjust the code in the actionPerformed
method to that shown in Figure 9 and re-run the code.
Now when we click to run the model, it runs and we get the chart produced!
But there is a problem. When we close the chart the whole application closes!
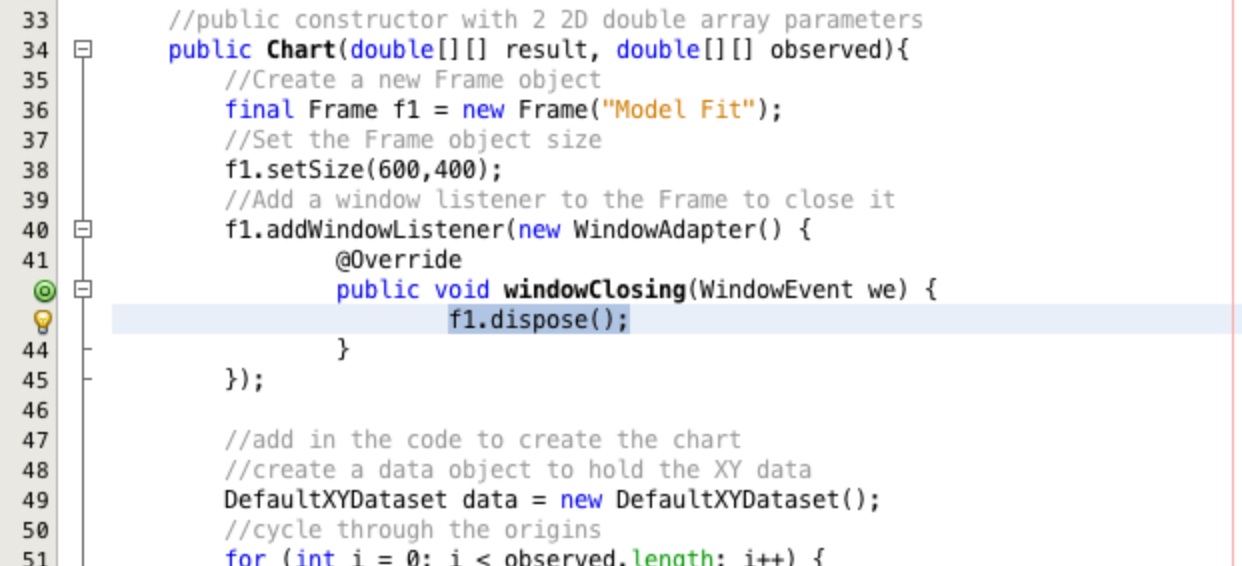
To stop this open up the Chart class and go to the beginning of the constructor
that takes in the two 2D arrays as parameters. Prefix the Frame f1 = new Frame("Model Fit"); with
the keyword final. Change the System.exit(0); for f1.dispose(); as shown
in Figure 10.
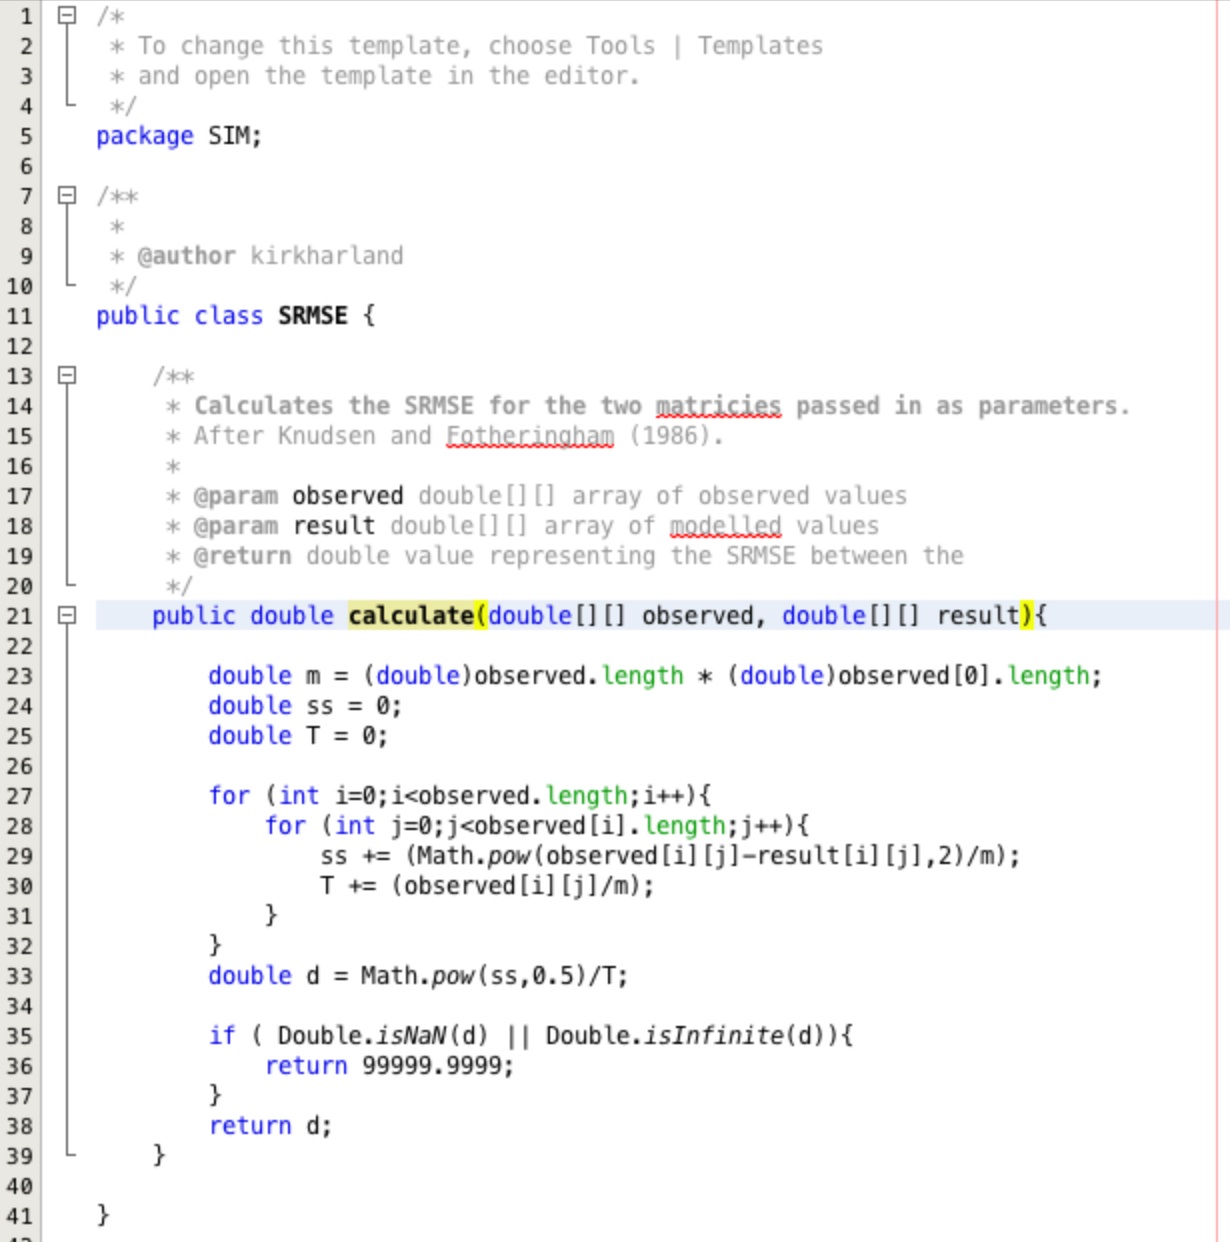
Adding a Goodness of Fit Statistic:
We will make one last enhancement to the code. Create a new class called SRMSE in the SIM
package. Insert the code shown in Figure 11 into the new class.
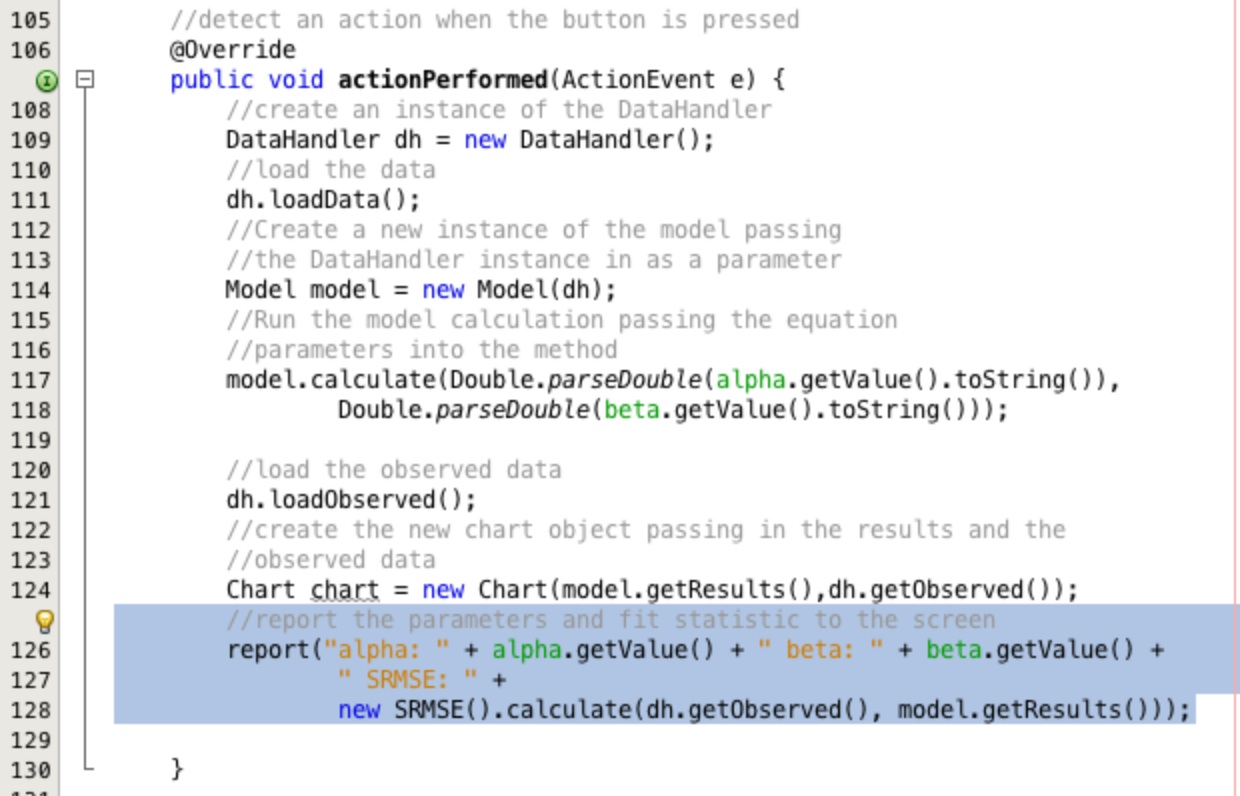
Now lets report our parameter settings and the fit statistic to the reporting area.
Add the line highlighted in Figure 12 to the bottom of your actionPerformed method in your
SpatialInteractionModel class. Now when you run the model you get a message to the screen to tell you
what your parameter configuration was and what the SRMSE was for the model run with those parameter values.
Have a play with the parameters in the model to see if you can get reduce the SRMSE value as far as possible to calibrate the model.
Think back to how we declared the different controls in our GUI. All of the text handling controls were declared
as instance level variables, whereas the 'run model' button was declared as a local variable. Why do you think this is?
What difference would it make if all of the controls had been declared as local variables in the setUpFrame
method?
Summary:
- Extending a class allows us to access the methods and variables within the extended class to make use of them in the
sub-class like we have with
JFrame - The controls we add to the GUI are third party code that we
importand make use of. We do not know how the controls are implemented just how they behave. - Carefully selecting the controls for GUI means we can add an easy to use interface with surprisingly little code.